I’m excited to begin a hands-on lab series designed especially for those preparing for the CCNA certification or anyone looking to strengthen their understanding of Cisco networking basics. These Cisco labs will serve as a practical guide, helping both beginners and intermediate users quickly grasp essential network configuration concepts using real-world scenarios.
In this first lab, we’ll start with something simple but foundational, how to change a router’s hostname using Cisco Packet Tracer. While it may seem like a small task, setting the hostname is often the first step in configuring any router, helping you easily identify devices in larger network setups. It also lays the groundwork for more complex configurations we’ll explore in future labs.
Before we dive into this tutorial, make sure you have Cisco Packet Tracer installed and ready to go on your system. This tool is free to use and officially provided by Cisco, making it a great resource for CCNA exam preparation and practice.
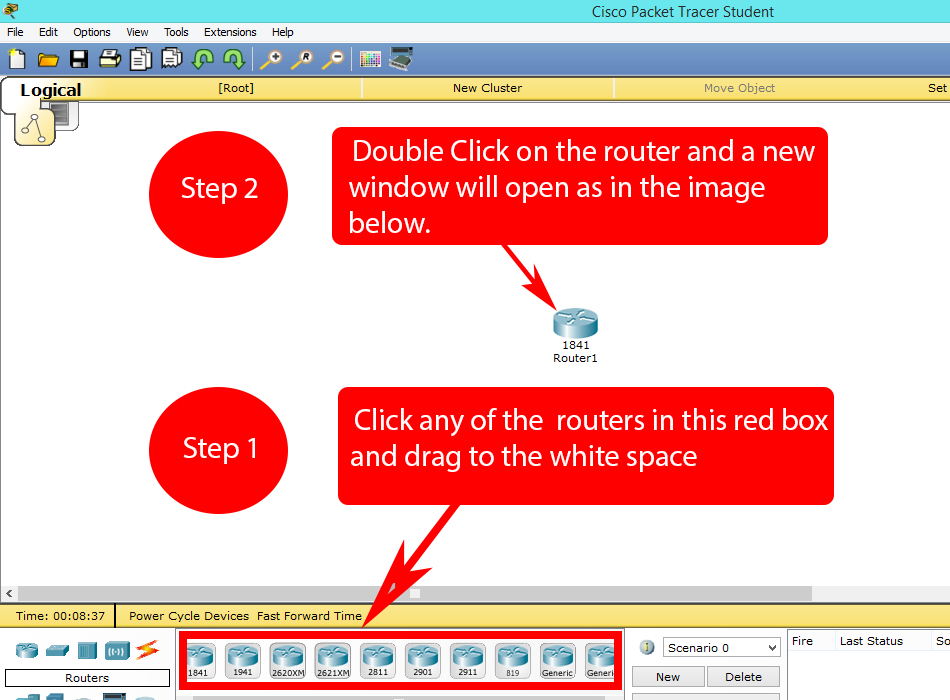
Step 1:
Open Packet Tracer.
Step 2:
Now click the router icon in the left bottom corner, all the routers will be displayed in the bottom middle section.
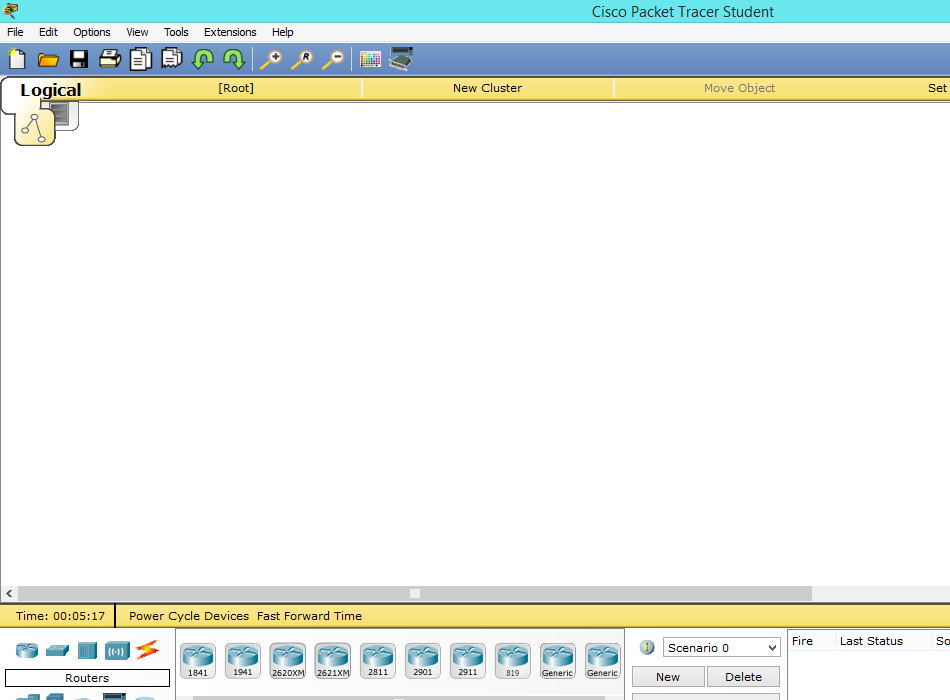
After completing the steps mentioned in the above image a new window will appear.
Step 3:
When configuring a router, it’s important to set both the router hostname and the router display name. The router hostname is the name that appears in the command-line interface (CLI) when you’re interacting with the router, making it easier to identify and work with multiple routers in a network. This name is crucial for managing and configuring devices in large networks, as it helps distinguish one router from another when entering commands or troubleshooting.
On the other hand, the router display name serves a different purpose, it is used for visual identification. This name typically appears on network diagrams or in the Cisco Packet Tracer interface, helping network administrators quickly recognize routers and their roles within the network topology. While both names might be the same in many cases, using them thoughtfully can enhance the clarity of your network’s design and streamline administrative tasks, especially when working with larger setups.
Setting these names early in the configuration process not only aids in network organization but also lays the foundation for more advanced configurations as you move forward with building your network.
Prepare for CCNA exam, Free 150 CCNA Switch Configuration MCQS with Explanation.

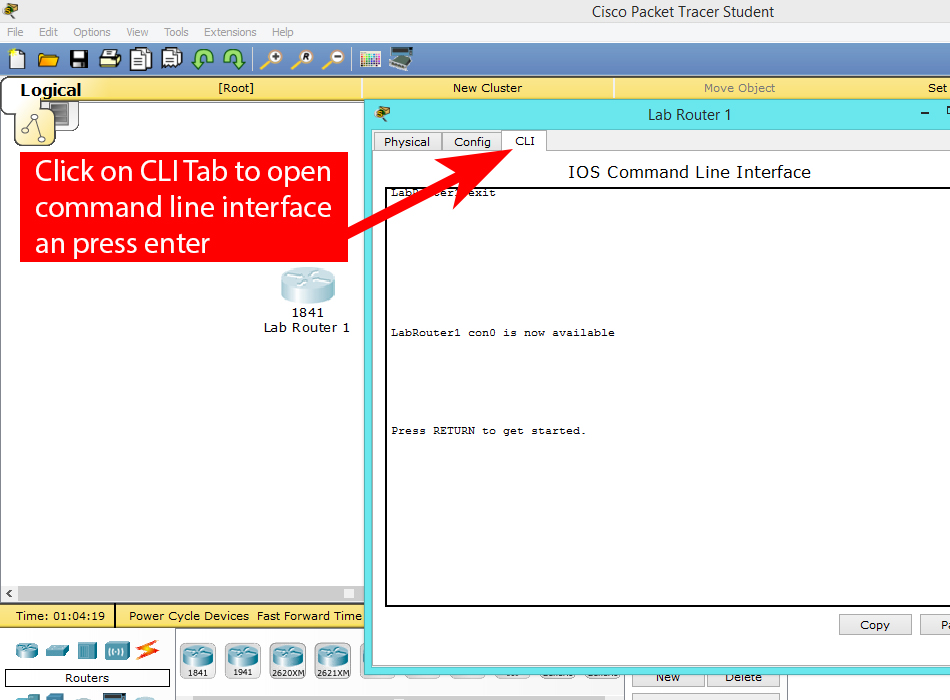
Step 4:
For those preparing for the CCNA exam, using the command line interface (CLI) is highly recommended. The CLI is the primary method for interacting with Cisco devices, and mastering it is a key part of understanding how to configure and troubleshoot networks effectively. To begin, simply click on the CLI tab in Cisco Packet Tracer or your router simulator, and you’ll be presented with the command line where you can start entering commands.
The CLI is not just a technical skill for exams; it’s also the tool that network professionals rely on daily to manage routers, switches, and other network devices. Becoming proficient in using it will not only help you with the CCNA exam but will also prepare you for real-world networking tasks. Whether you’re configuring IP addresses, setting up routing protocols, or securing your network, the CLI is where the action happens. Therefore, getting comfortable with it early on will significantly boost your understanding and confidence as you progress through your CCNA studies and beyond.
Click on the CLI tab for opening command line interface.
Step 5:
To rename or set the router hostname, you must first ensure that you’re in Global Configuration Mode. This mode is where you’ll make changes to the router’s configuration, including setting the hostname. If you’re unfamiliar with the different Cisco router modes, it’s a good idea to familiarize yourself with them, as each mode serves a specific purpose in network management.
Once you’re in Global Configuration Mode, you can change the hostname by simply typing the command hostname followed by your desired name for the router. For example, entering hostname Router1 will set the router’s name to “Router1.” This change will be reflected in the command-line interface (CLI), making it easier to identify the router when managing a network with multiple devices.
Choosing a meaningful and recognizable hostname is crucial for network management, especially in larger setups where you may be dealing with numerous routers and switches. It helps streamline configuration, troubleshooting, and overall network organization, especially as you expand your knowledge and work on more advanced configurations in your CCNA studies.
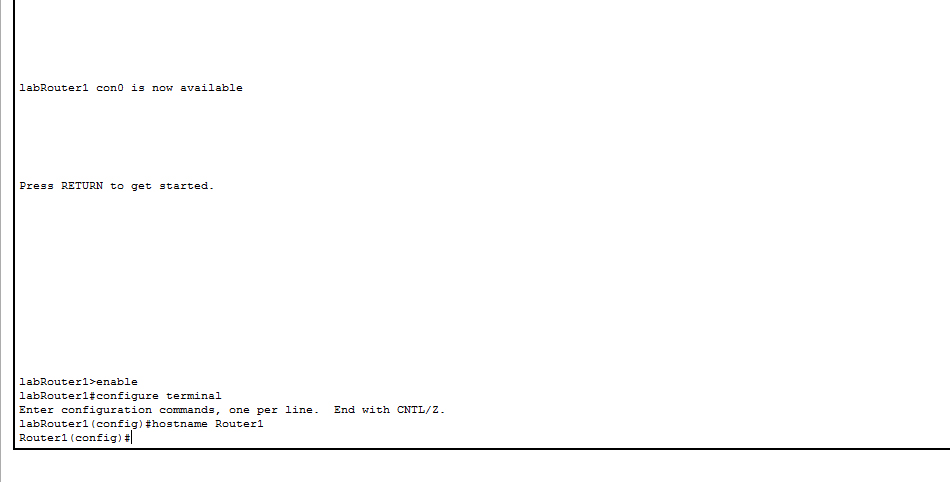
Our host name was labRouter1 and our prompt was labRouter1(config)# before executing this command ( labRouter1(config)# hostname Router1 ), notice that our prompt changes to Router1(config)#, confirming the change of our router host name.
I have written a detailed tutorial on the Basic Configuration of Cisco Router which will help you in getting familiar with the initial configuration of a router.
You should also read, 150 CCNA Switch Configuration MCQS with Explanation.


A router or switch must have its identity established to be accessible on the network to other devices.
A router or switch must have its identity established to be accessible on the network to other devices.
this router name will be changed when it is turned off
use this code in the administrative mode after you did the all changes.
“copy running-config startup-config”