
Table of content in a book or any documents is an important part of the document which let the readers easily navigate to the portions they are interested in. Creating a Table of contents in Ms word is an easy and simple process.
Ms Word let you create table of contents in 2 ways, 1. automatically insert table of content, 2. manually insert table of contents.
You need to prepare the document before telling Ms word to create table of contents automatically , other wise you can add a table of content manually if you have lots of spare time.
Prepare the document for inserting Table of Contents:
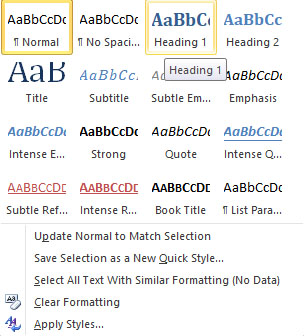
In your text document right click on the first heading which is to be appeared in table of content and select Style and then select Heading 1.

Alternatively you can apply Heading style from the home menu tab. For doing so select Home tab and then select Heading 1 style from the menu.

Apply the Heading 1 style to all the headings in your word document which you want to appear in the Table of contents.
Insert Table of Contents in Word:
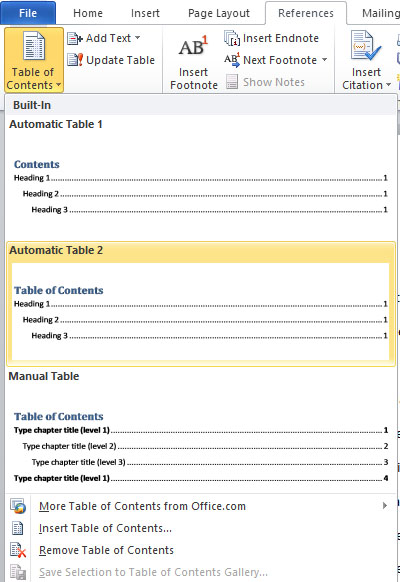
1. Position the cursor where you want the table of content to appear, click on the References tab at the top menu.

2. Click on the Table of Contents and select one from these “Automatic Table 1” and “Automatic Table 2”.

The only difference between Automatic Table 1 and Automatic Table 2 is the heading text, which is “Contents” and “Table of contents” respectively.
If you want to create table of contents yourself then select Manual Table from the Menu.
Its that easy, hope that you liked this tutorial. Support us by sharing this on social media with your friends.


