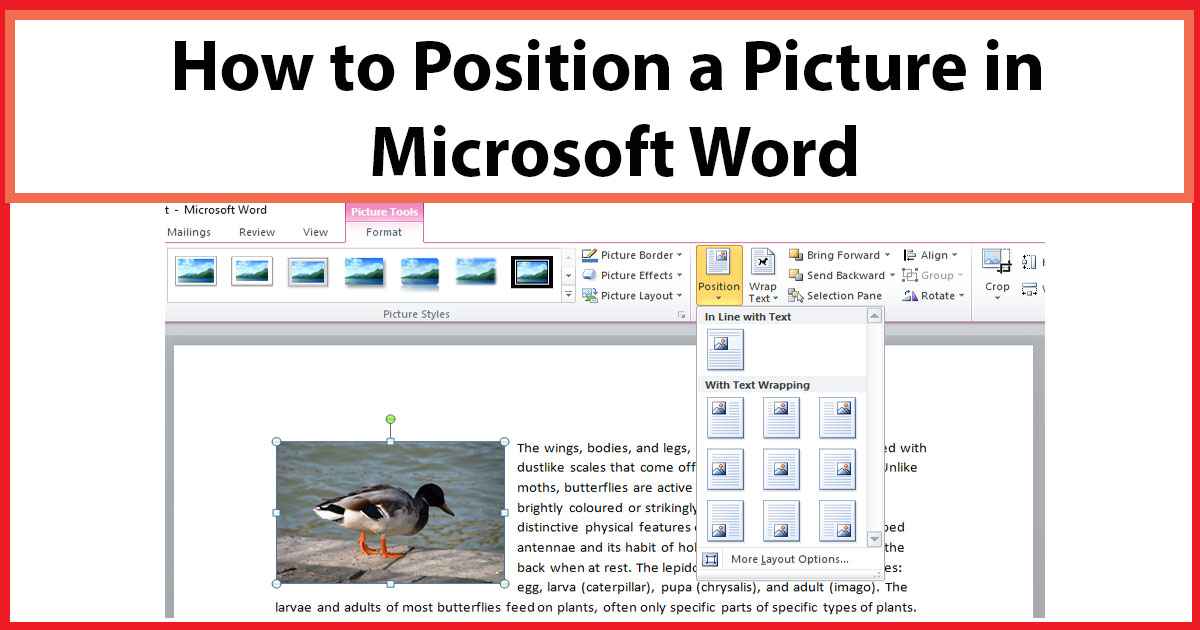
A graphic or picture inserted in word is by default in line with text, which means this picture or graphic is treated as text. When you type text this object moves with text. If you want your picture inserted in word stays where you placed it then you should select an option from the Wrap Text menu, this will also ensure that you can move any graphic freely in word document. Wrapping text in word automatically accommodate the text around graphics. In this tutorial we will show you how to position a picture in word, you should also read how to wrap text in word.
Steps to position a picture in word:
1. Insert the picture or graphic in your word document.
2. Select the picture by clicking on it.
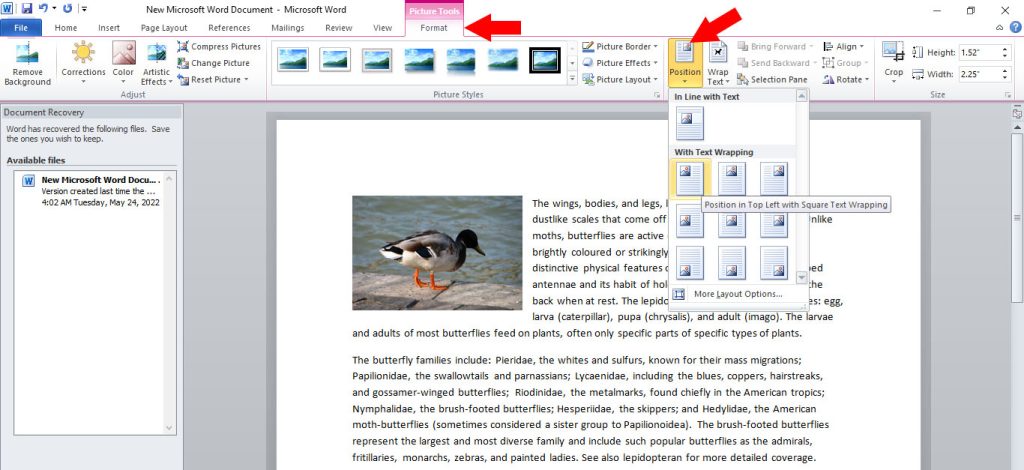
3. Click on the Format Tab and then click on Position icon to open Position Menu options.
4. Choose an option from the nine options under With Text Wrapping title.
- Select the first option if you want to position your picture in top left
- Select the second option if you want to position your image in the top middle.
- Select the 3rd option if you want to position the picture in top right.
- Select the 4th option if you want to position the picture in middle left.
- Select the 5th option if you want to position the picture in middle center.
- Select the 6th option if you want to position the picture in middle right.
- Select the 7th option if you want to position the picture in bottom left.
- Select the 8th option if you want to position the picture in bottom center.
- Select the 9th option if you want to position the picture in bottom right.
Hope that you have learned to position a Picture in Word. Learn More about Ms Office here Microsoft Office Tutorials.


