Thinking of starting your blog, portfolio, or small business website? WordPress is the perfect platform, and installing it via Softaculous in cPanel is the easiest way to get started. No need to download files, create config files, or upload anything manually. This friendly, detailed guide will walk you through the entire process—plus show you how to manually set up a database, what you must do and what to avoid and best practices to ensure a smooth start.
What You’ll Need Before Starting:
- Access to your hosting cPanel login
- A domain name pointed to your hosting
- 5–10 minutes of your time
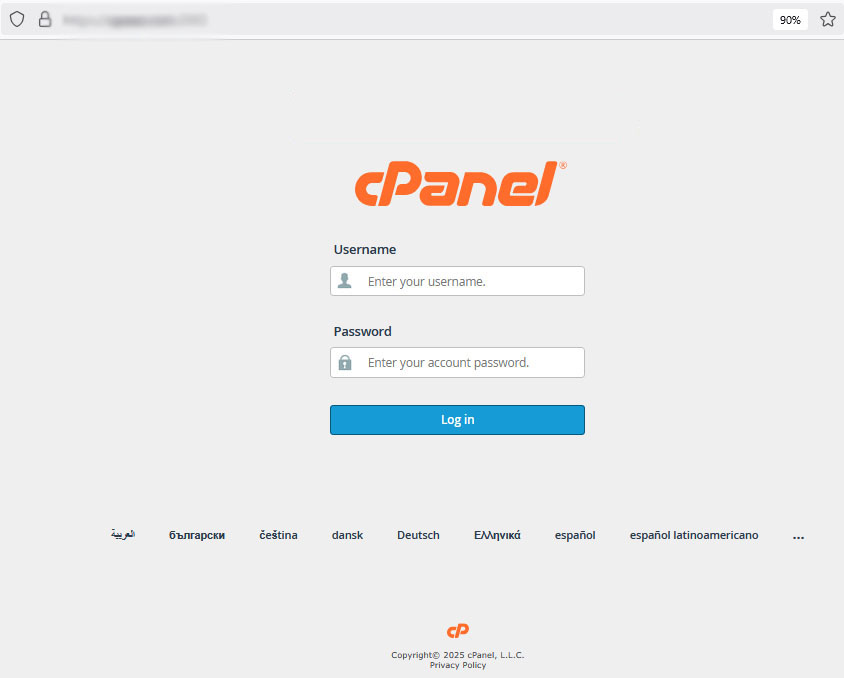
Step 1: Log in to Your cPanel Dashboard🔐
Go to yourdomain.com/cpanel and enter your credentials.
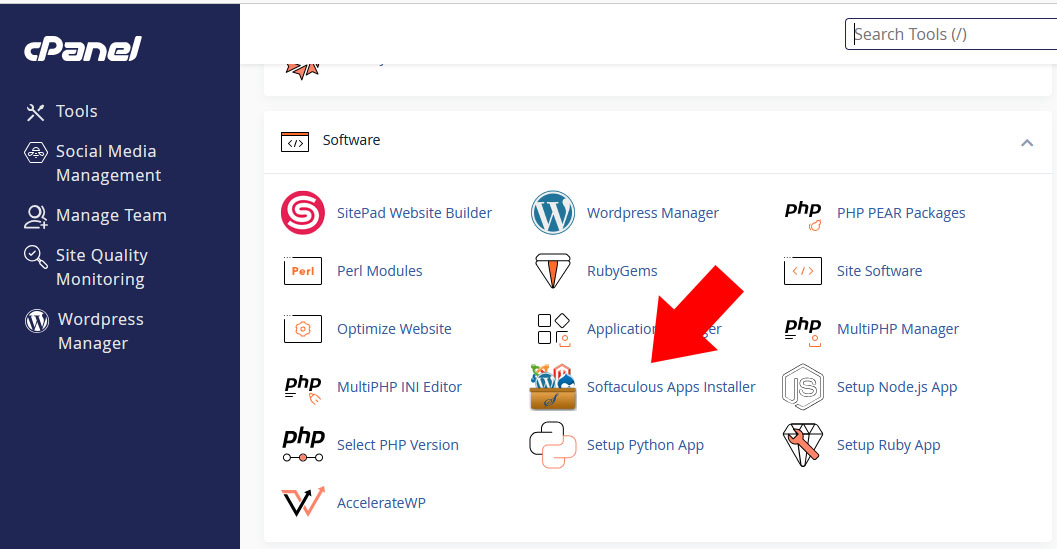
Once logged in, you’ll see your cPanel home. Scroll down or search for Softaculous Apps Installer or simply “WordPress.”
Step 2: Launch the Softaculous WordPress Installer
Locate WordPress icon under Softaculous.
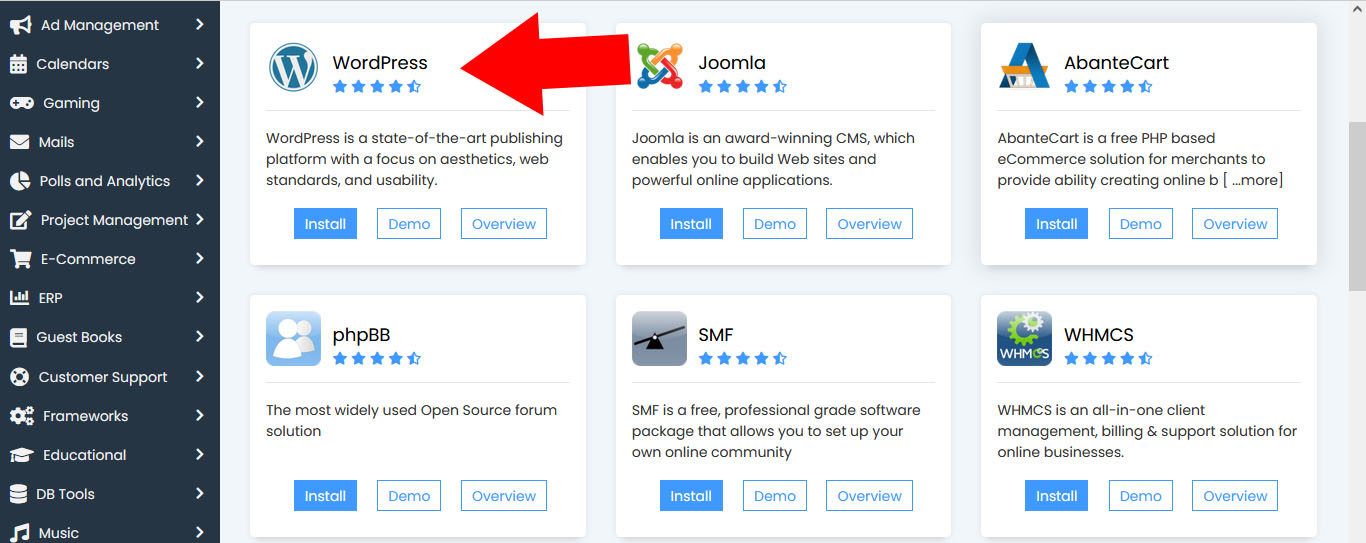
Step 3: Click the “Install” Button
Here’s where the magic happens. Click Install.
Step 4: Fill in the Installation Details
This section has multiple fields. Let’s go through each:

1. Choose Protocol
Choose https:// if you have SSL (recommended) or http:// if not.
✅ Best Practice: Always install an SSL certificate and use HTTPS.
2. Choose Domain
Pick the domain you want to install WordPress on.
3. In Directory
Leave this blank if you want WordPress at your main domain (like yourdomain.com).
⚠️ Don’t enter “wp” unless you want it at yourdomain.com/wp
4. Site Settings
Your site’s name
Site Description: A short tagline (you can change this later)
5. Admin Account
Username: Avoid “admin” (choose something unique)
Password: Use a strong password
Email: A valid email address
🔐 Do not use the default “admin” username – it’s vulnerable to brute-force attacks.
6. Choose Language
Select your preferred language (default is English).
7. Select Plugins (Optional)You can skip this or choose any plugin you need.
8. Advanced Options
(Optional but Recommended)Enable auto-upgrades
Set a backup location and schedule
9. Select a Theme
Select a Theme (Optional)You can install a theme now or change it later inside WordPress.
Screenshot: (Insert screenshot showing filled-out form)
Step 5: Click “Install” and Wait
Click the Install button at the bottom.
Softaculous will now install WordPress. This typically takes 1–2 minutes.
Screenshot: (Insert screenshot of installation progress)
Step 6: Access Your New WordPress Site
Once installation completes, you’ll see links like:
yourdomain.com (your site)
yourdomain.com/wp-admin (WordPress dashboard).
Congratulations! WordPress is successfully installed. Once WordPress is installed, your next step is to launch your site. Follow this complete guide to starting a WordPress blog in 2025 to set up your blog the right way.
Bonus: How to Manually Set Up a Database (Optional)If Softaculous fails, or you want more control:
When Should You Manually Create a Database and User in cPanel?
1. When Installing WordPress Manually (Without Softaculous)
If you’re uploading WordPress files via FTP or File Manager and running the installer manually (via wp-config.php and install.php), you must create:
- A MySQL database
- A database user
- And assign that user to the database with full privileges
2. When You Want More Control or Customization
Some users prefer manual setup to:
- Choose a custom database name and user prefix
- Avoid generic or auto-generated credentials
- Integrate with custom apps or tools beyond WordPress
3. When Softaculous or Auto-Installers Are Not Available
Not all hosting providers offer Softaculous. If it’s missing or not working, manual installation is your fallback.
4. When Migrating a Website
During migration, you’ll:
- Export/import a database
- Create a matching database/user manually on the new host before restoring the site
🔍 Why Manually Create a Database and User?
🔒 1. Better Security
- You can use stronger, custom usernames/passwords
- Avoid predictable database names like
wp123, which are common in auto-installs
🎛️ 2. More Control
- You choose naming conventions that make it easier to manage multiple sites (e.g.,
blog_db,store_user) - You control the privileges assigned to each user
🛠️ 3. Useful for Advanced Configurations
- Needed for custom WordPress installations (like multi-site setups)
- Helpful if you’re planning to connect external applications to the same database
📁 4. Database Reuse (Advanced Use Cases)
You may want:
- One user managing multiple databases
- Or using one database for multiple apps (e.g., WordPress + custom PHP scripts)
✅ Benefits of Manual Database Creation
| Feature | Benefit |
|---|---|
| 🎯 Customization | You define names and privileges |
| 🔒 Security | Use complex, non-default usernames |
| 🔧 Control | Better integration with other systems |
| 📦 Portability | Easier for migration and backups |
| 🛡️ Redundancy | You can back up database separately from files |
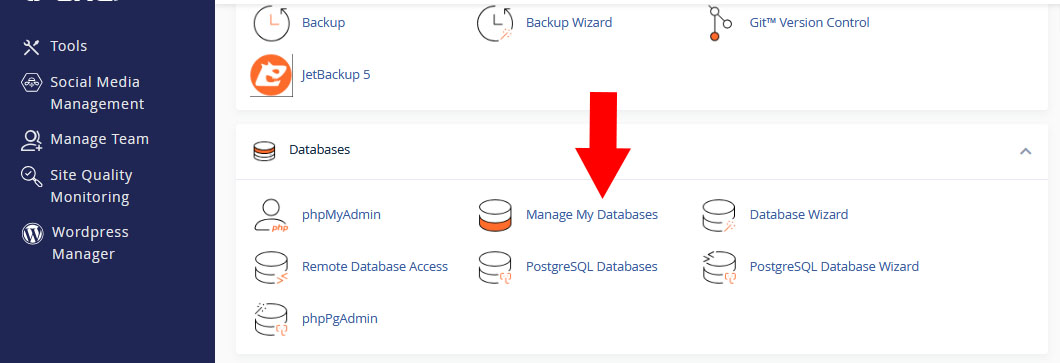
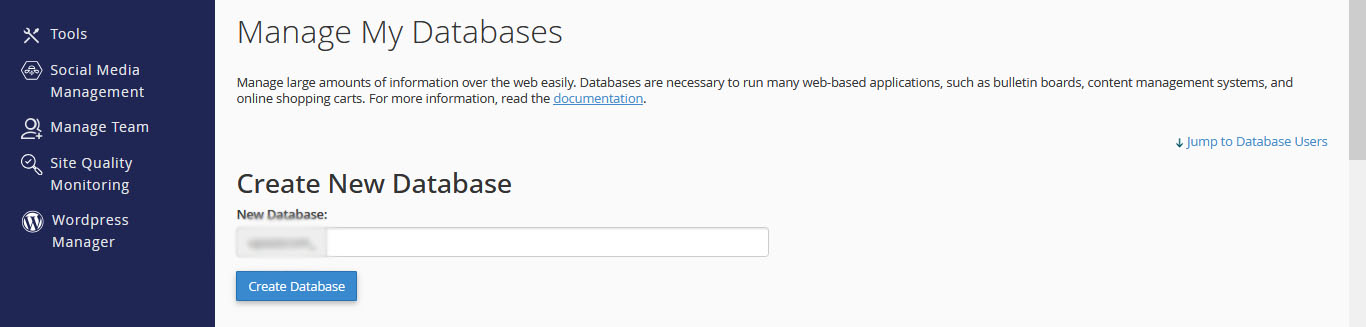
Step 1: Go to MySQL® Databases in cPanel
- Create a new database.
- Add a database user and assign a strong password.
- Add the user to the database with All Privileges.
Step 2: Note These Details
You’ll need:
- Database Name
- Database Username
- Password
Use these during the manual WordPress install (when uploading WordPress manually).
Screenshot: (Insert screenshots of database creation steps)
Do’s and Don’ts
✅ Do:
- Use unique usernames and strong passwords
- Keep WordPress, plugins, and themes updated
- Install an SSL certificate for HTTPS
- Use a security plugin (like Wordfence or Sucuri)
❌ Don’t:
- Use “admin” as your username
- Ignore plugin/theme updates
- Install too many plugins (can slow down your site)
Best Practices for Running your WordPress Site
- Take backups regularly (use Softaculous or plugins like UpdraftPlus)
- Install a caching plugin for performance (e.g., WP Super Cache)
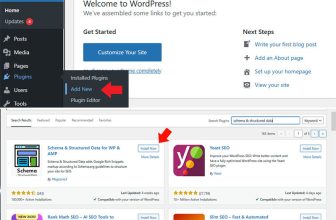
- Use SEO plugins (e.g., RankMath or Yoast SEO)
- Choose lightweight themes for speed
- Add Google reCAPTCHA to login and contact forms
You’re all set! Installing WordPress with Softaculous is fast, reliable, and perfect for beginners. Just follow the steps carefully, and your site will be live in minutes. Now go ahead, install your favorite theme, write your first post, and launch your brand!