Its the beauty of Microsoft Word that it is not only a text writing and editing software but is a complete package of document design. We can add pictures in Ms Word and can perform a number of operations on these pictures but this tutorial is all about how to crop photos in ms word.
Cropping pictures means to cut out the unwanted area of a picture. Simple cropping of photos in word is really easy, but do you know that you can also crop images to shapes in Word?, Don’t worry here we will discuss all options related to cropping images in word.
Simple Cropping photos in word:
Select the picture you want to Crop.
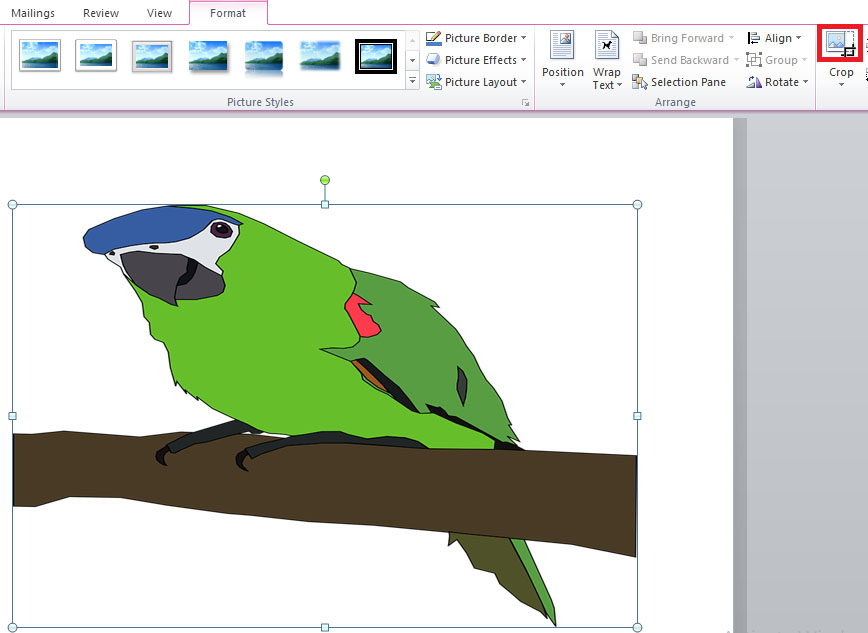
1. Select the Format Tab from the top menu bar and then click on Crop Icon.
2. Move these marks inward to cut out the greyed area, as shown in the screenshot below.
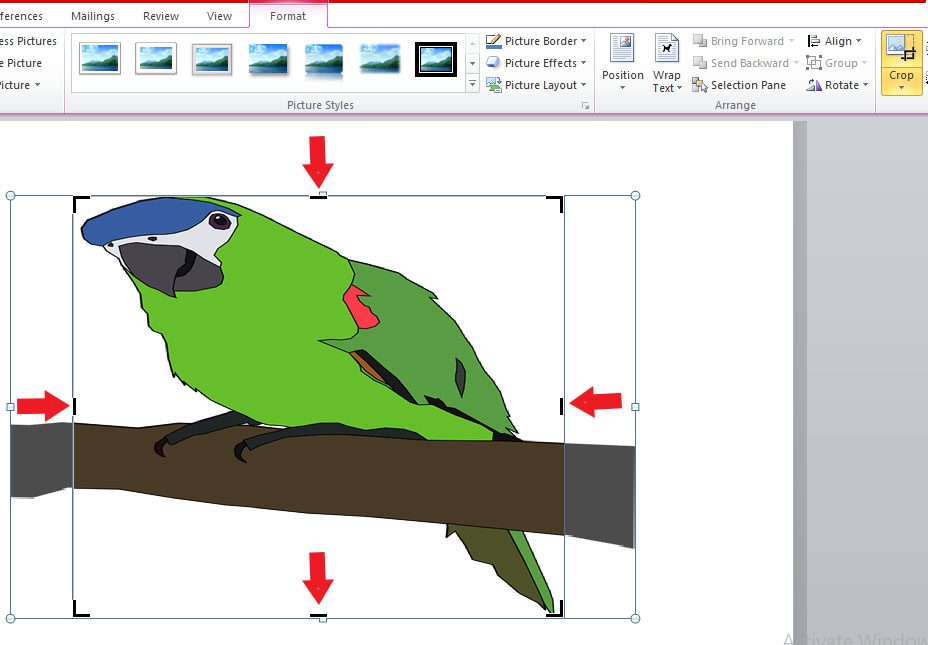
3. Now click out side the picture area and your picture will be cropped.
Crop picture to Shapes:
1. Insert a photo in word and select it.
2. Select the Format Tab from the top menu.
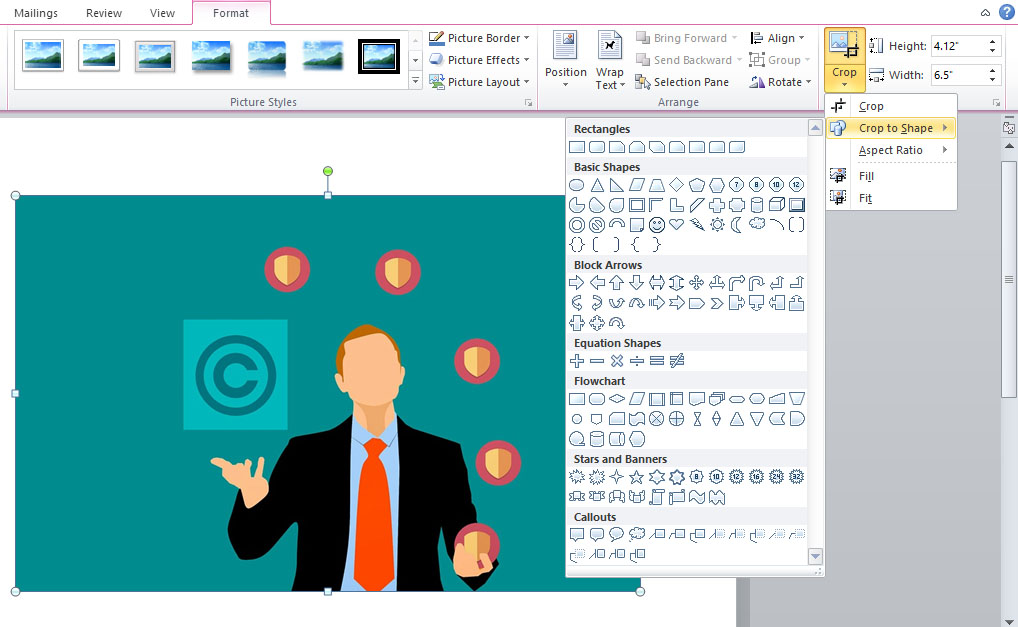
3. Click on the small downward arrow below the crop icon.
4. Hover over on Crop to Shape Option and Select any shape you want.
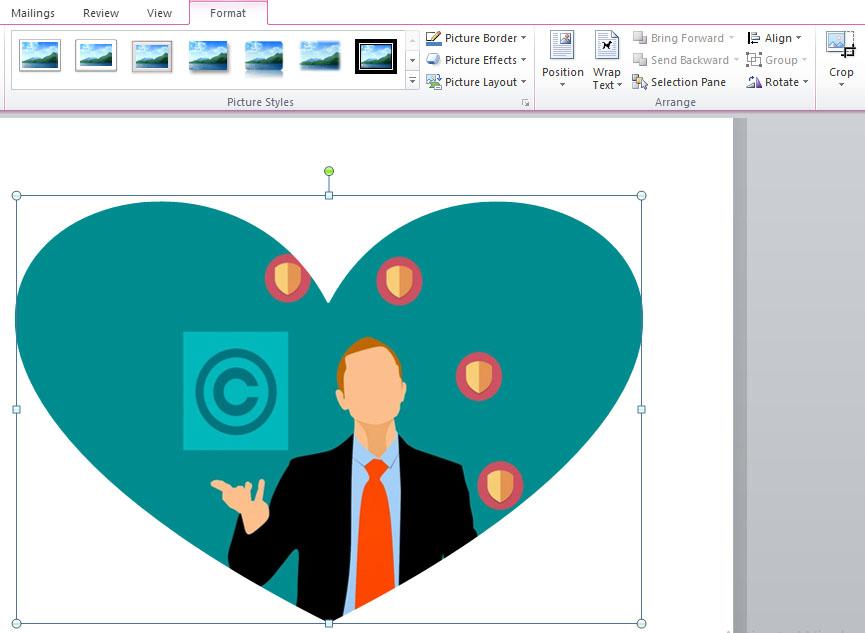
We selected the heart shape and here below is the result.
How to change size of crop to shape in word:
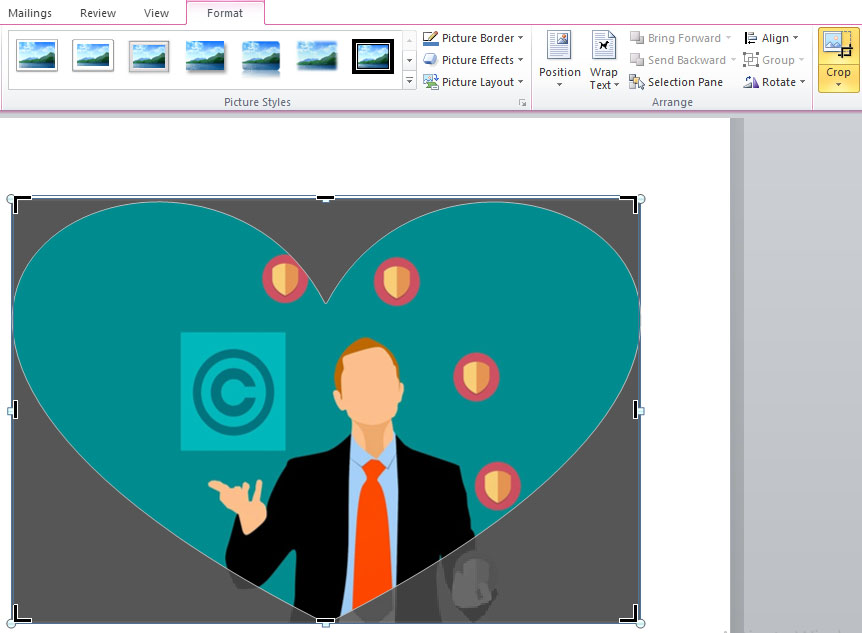
If you are not happy with the size of shape or in other words, if the size of shape is too small or to big, you can adjust it by clicking on the Crop icon.
Select the picture to which crop to shape is applied and click on the crop icon and adjust the size of shape by moving the small black bars around the picture inward or outward.
Crop photos and keep the exact aspect ratio:
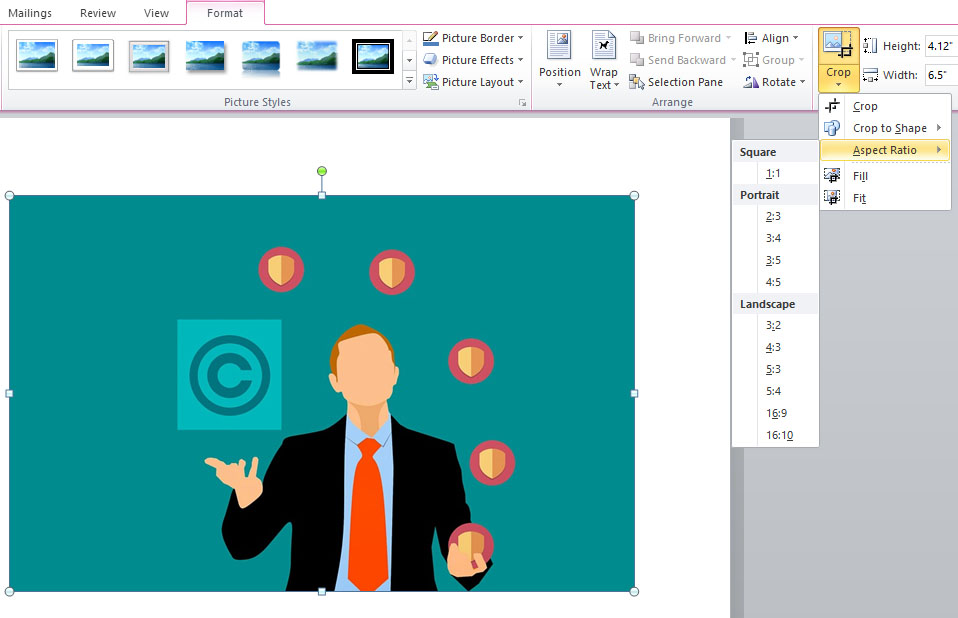
If you want to keep the aspect ratio while cropping pictures, Microsoft word present you with options for aspect ratios of Square, Portrait and Landscape images.
Click on the downward arrow under crop icon and select any from the list of aspect ratios.
That’s all about how to crop pictures in Microsoft Word, hope you liked it.


