Performing Post-Installation Tasks on Windows Server:
In this lab we will complete the tasks which are necessary after the installation of a freshly installed server. This lab is for the bare metal installation of a new Windows Server 2012 R2.
1. Log in As Administrator:
When installation finishes, log on to the server using Administrator privileges.
2. Locate Server Manager:
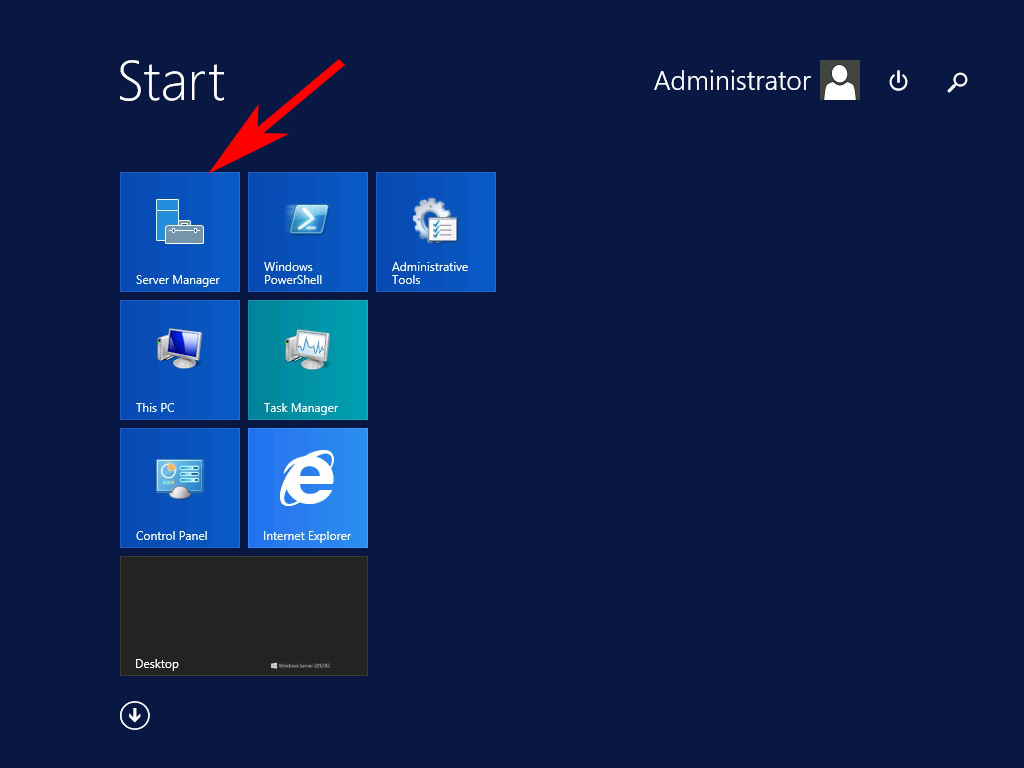
After Logging on as administrator Server Manager Console automatically opens, if it is not loaded automatically, press start button on your keyboard and select Server Manager.
3. Open Server Manager:
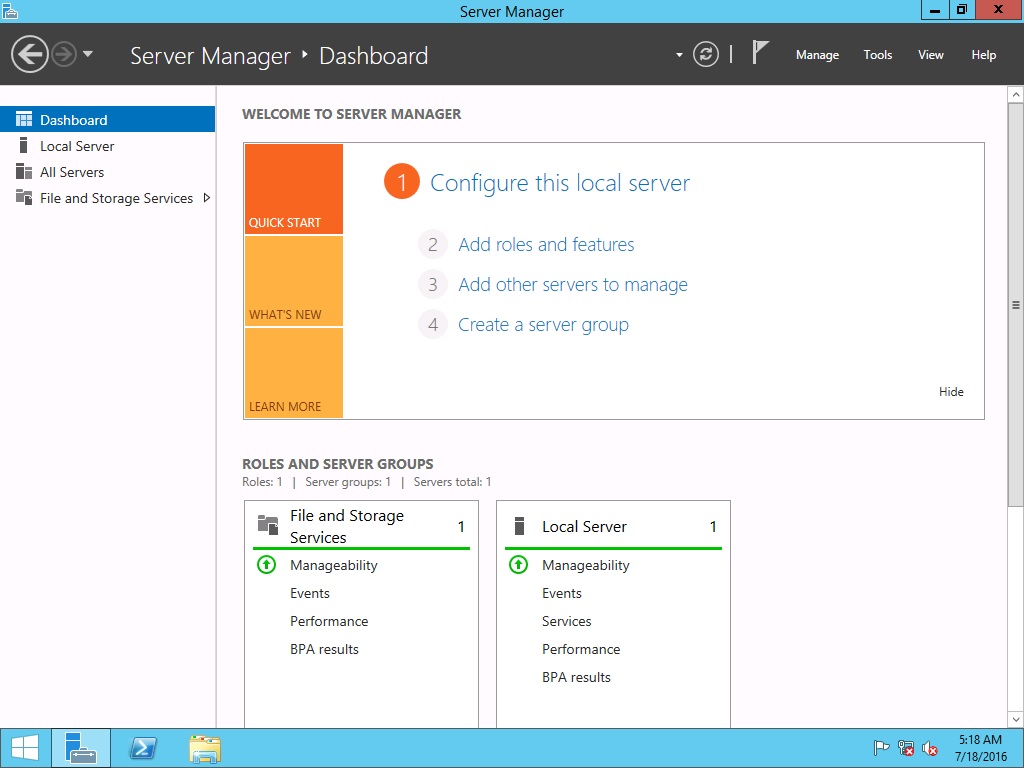
Server Manager opens it should look like the following screen shot.
4. Configure Local Server Properties:
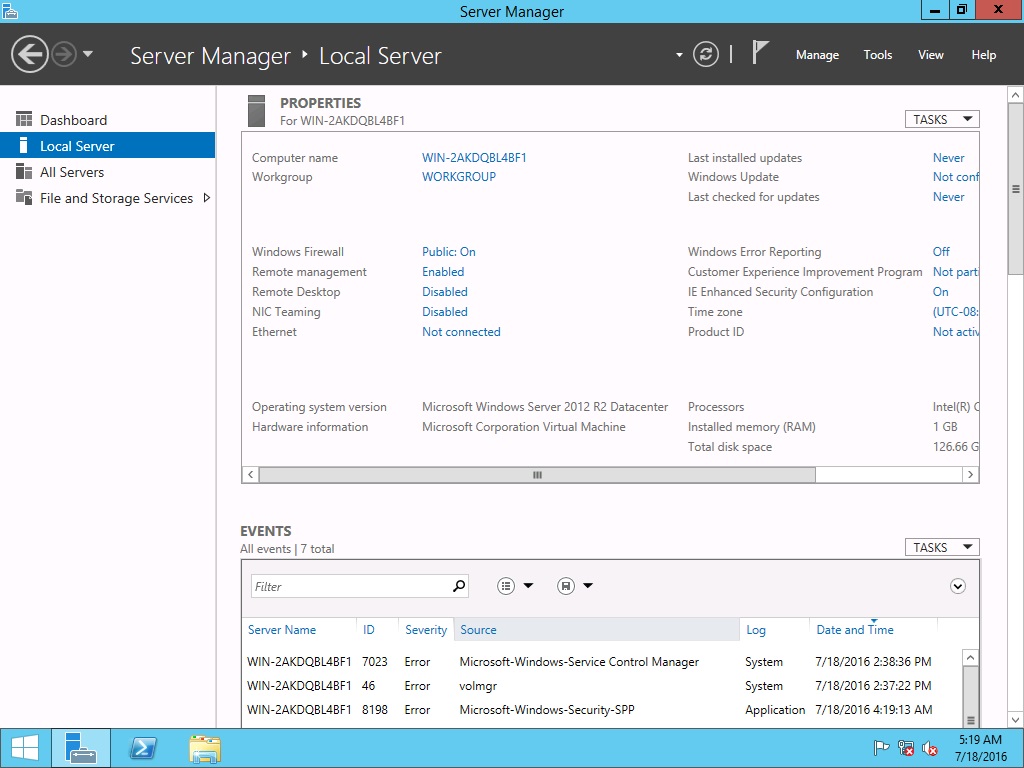
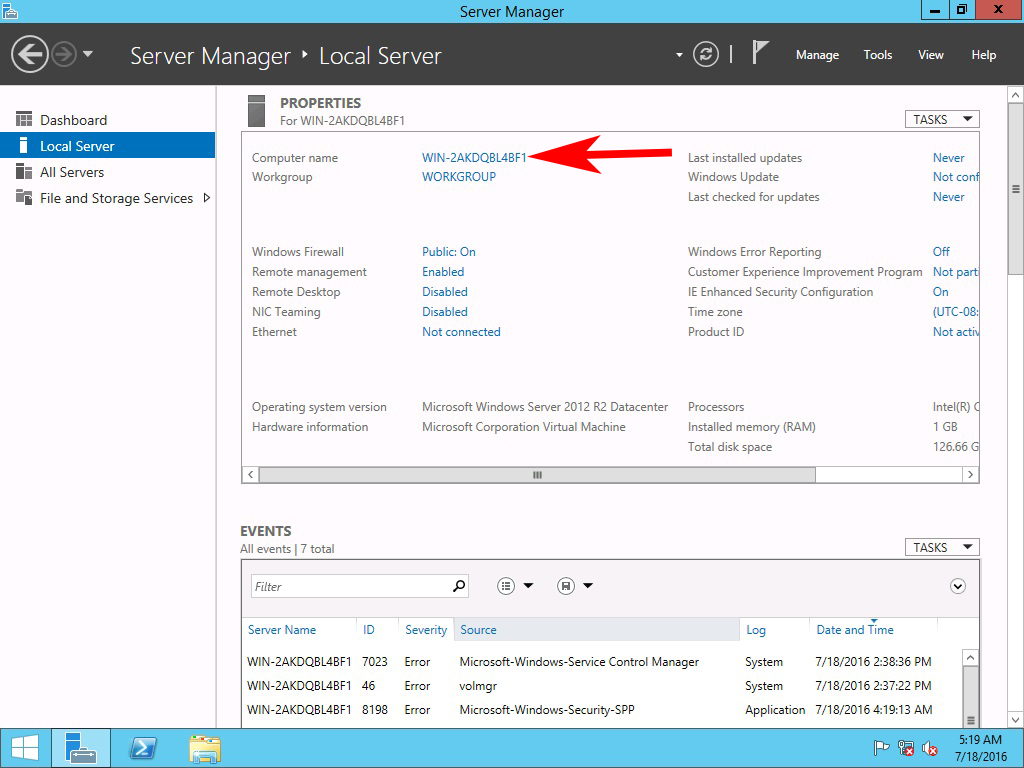
In Server Manager window click on the local server in the left sidebar.
5. Set Server Name:
Click on the value of computer name.
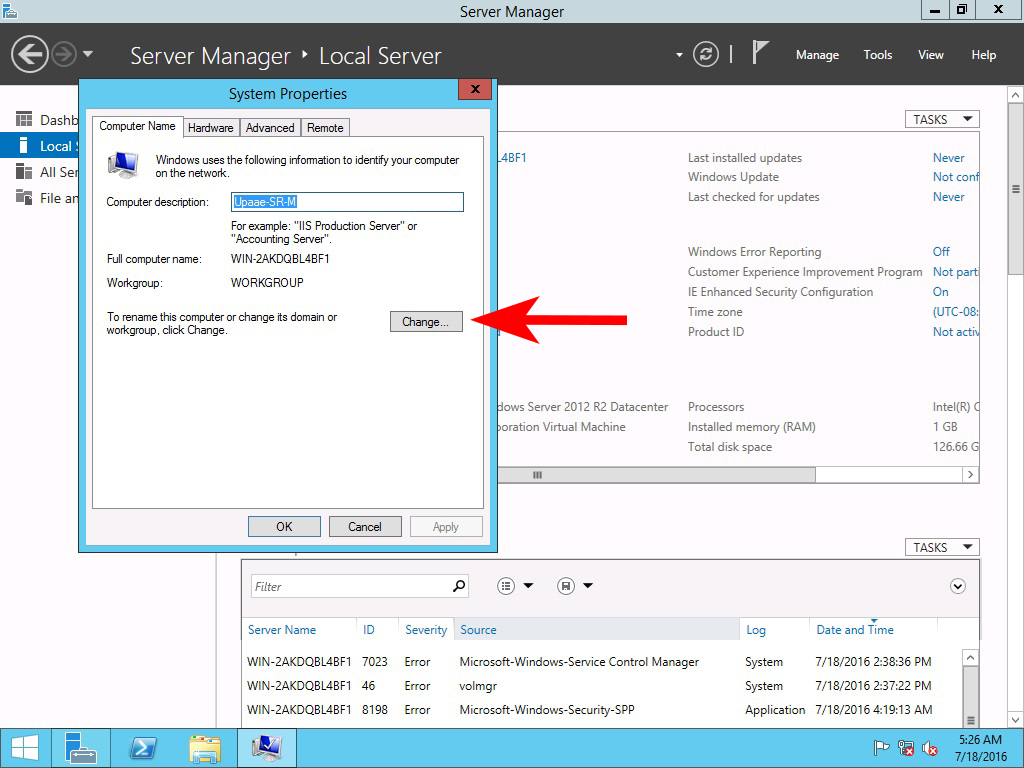
A new window will open, type description for this server and than click on the change button for specifying the server name.
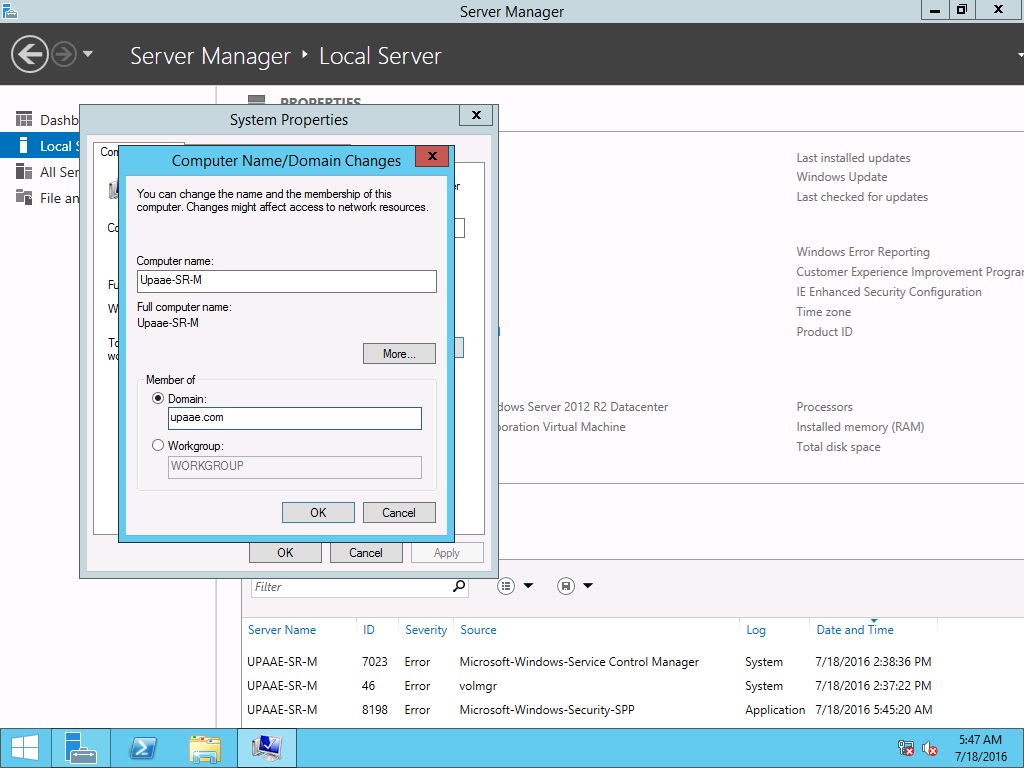
Note: If you already have a domain controller in your network than choose the option Domain and enter your domain name OR if this is your first server in the network than leave the WORKGROUP option selected.
6. Set Time Zone/ Date and Time:
In Servers as well as computers setting the correct time zone is very important, When we are in front of computers we do not look at wrist watches or cell phones to check current time but instead we look at clock in the computer screen. Incorrect time will not just result in missing launch time but will affect scheduled tasks, file information, software and access authorization and will cause other time discrepancies.
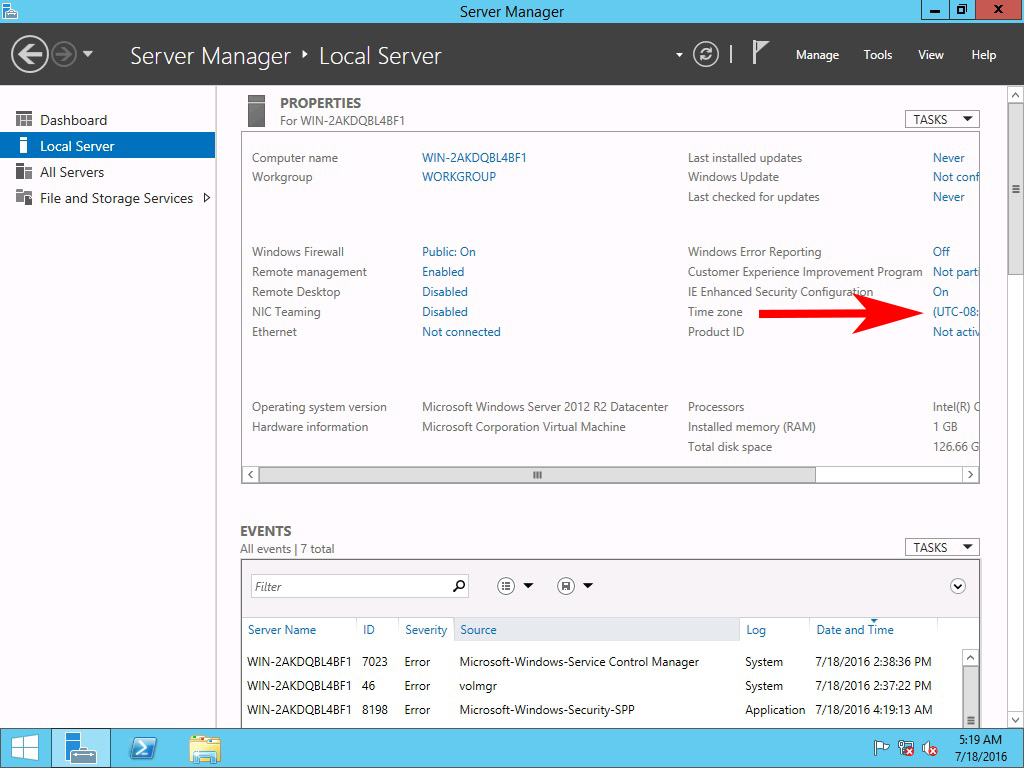
Click on the time zone value.
Select your time zone from the “Date and Time” window, set date and time if not already set and click OK button.
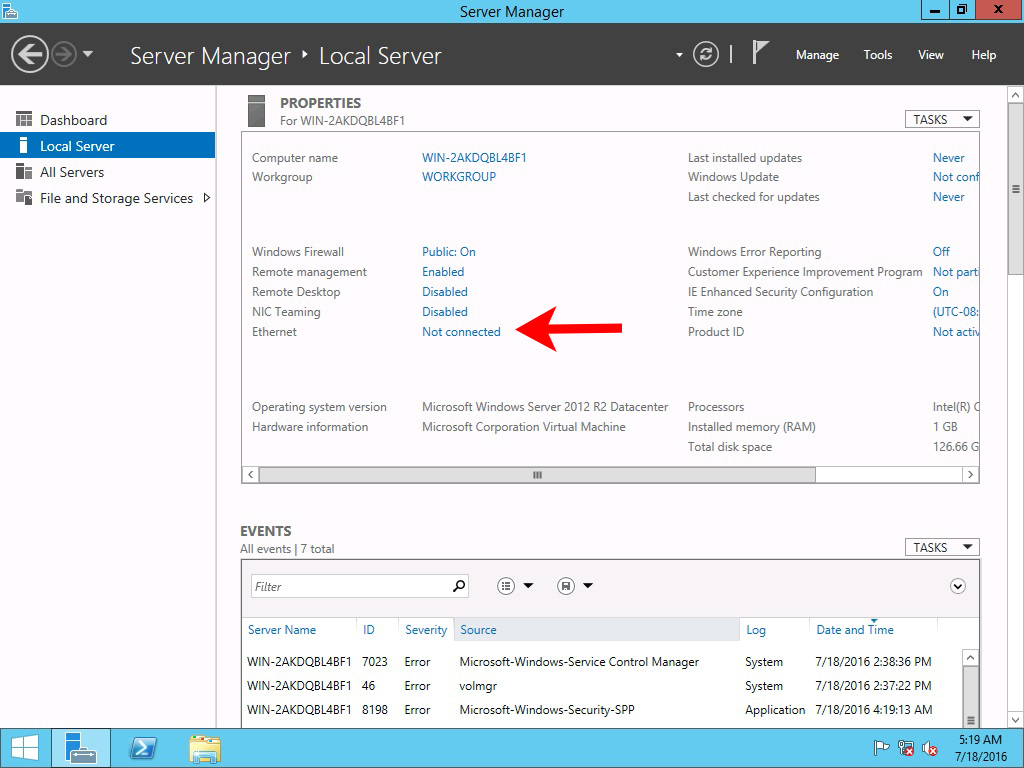
7. Configure Network Details:
Click on the Ethernet value.
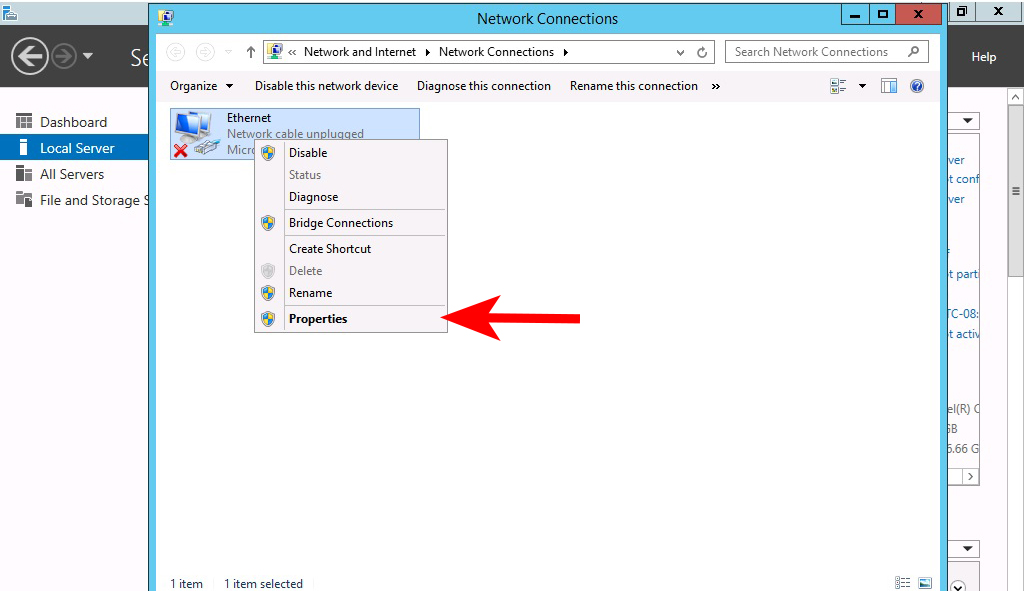
On the network connection window, Right-click the Ethernet connection and from the context menu, select Properties. The Ethernet Properties sheet will appears.
8. Configure TCP/IP:
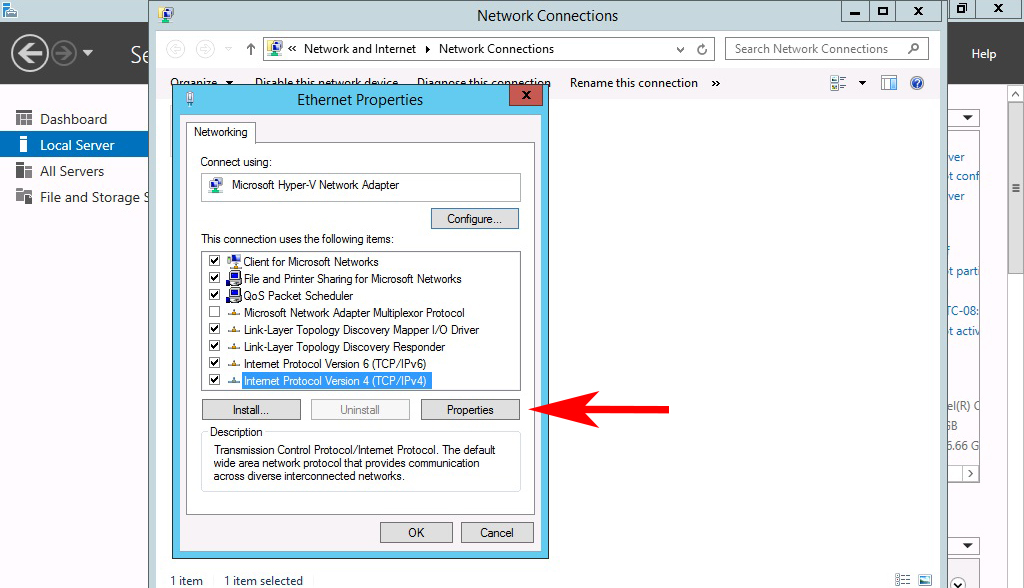
Double-click Internet Protocol Version 4 (TCP/IPv4) OR select Internet Protocol Version 4 (TCP/IPv4) and click on properties button. This will open Internet Protocol Version 4(TCP/IPv4) Properties sheet.
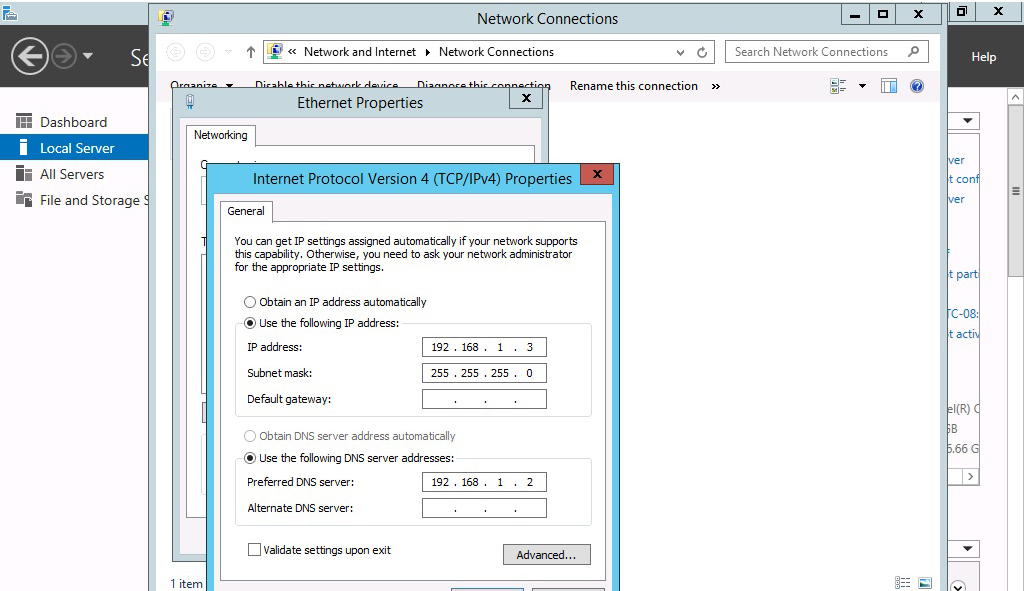
On the Internet Protocol Version 4(TCP/IPv4) Properties sheet, we will enter network details which are as follows.
Note that servers should be configured with static IP address. Select the Use the following IP address option and, in the text boxes, type the following
values:
IP address: 192.168.1.3
Subnet mask: 255.255.255.0
Default gateway: Leave blank
Select the Use the following DNS server addresses option and, in the text boxes, type the
following values:
Preferred DNS server: 192.168.1.2
Alternate DNS server: Leave blank
Click OK to close the Internet Protocol Version 4 (TCP/IPv4) Properties sheet.
Click OK to close the Ethernet Properties sheet.
This is it, you have successfully performed the post-installation tasks for Windows Server 2012 R2. Do visit us for new MCSE Labs.






Step by step with clear explanation ..please share more posts related to server migration ,server troubeshooting