In this tutorial you will learn how to install Active Directory Domain Services (AD DS) Role on a system running Windows Server 2012 R2 (named Upaae-SR-M ). The server on which AD DS is running is known as a Domain Controller(DC).
Step 1:
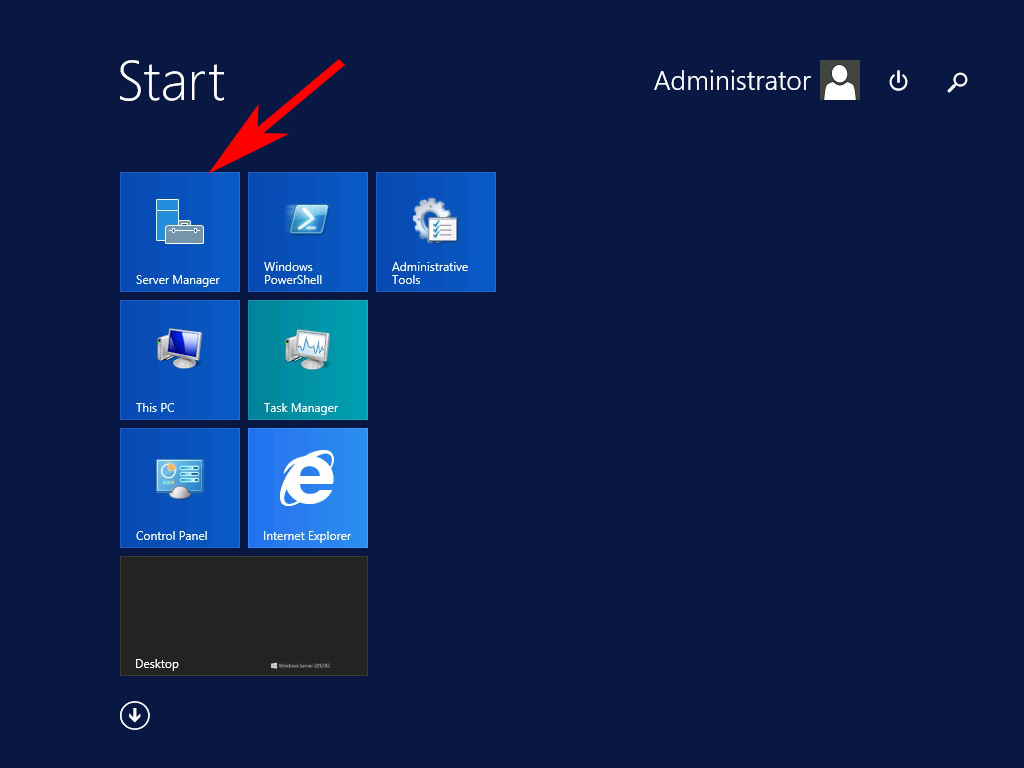
Open Server Manager by clicking Server Manager in the start menu.
Step 2:
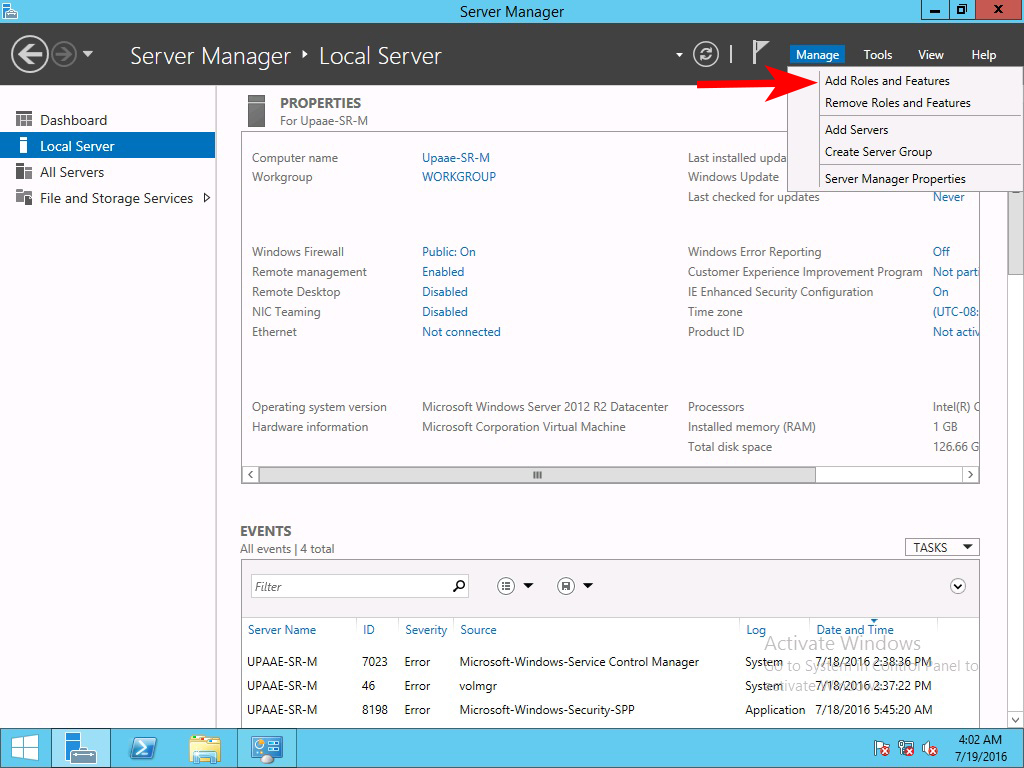
In Server Manager window click on the Manage menu in the top right menu bar, and select Add Roles and Features option from the context menu.
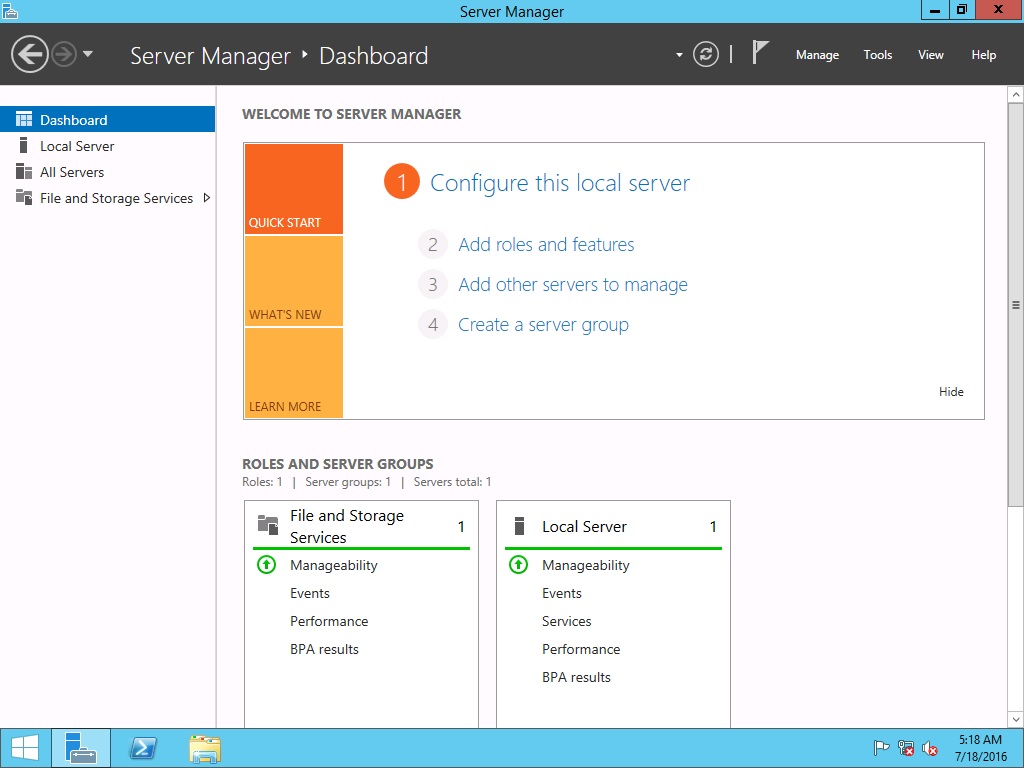
OR when the dashboard is selected in the left sidebar, click on the Add roles and features option.
Step 3:
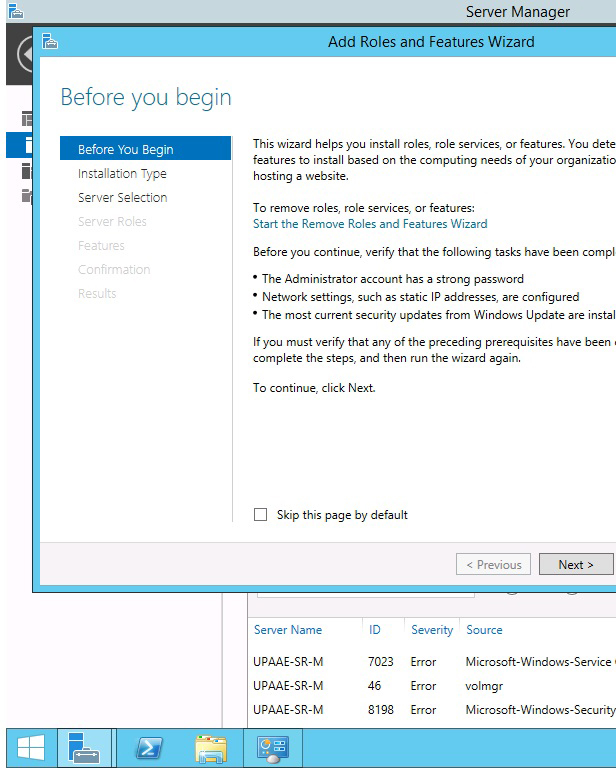
After completing Step 2, the Add Roles and Features wizard will open, click next button.
Step 4:
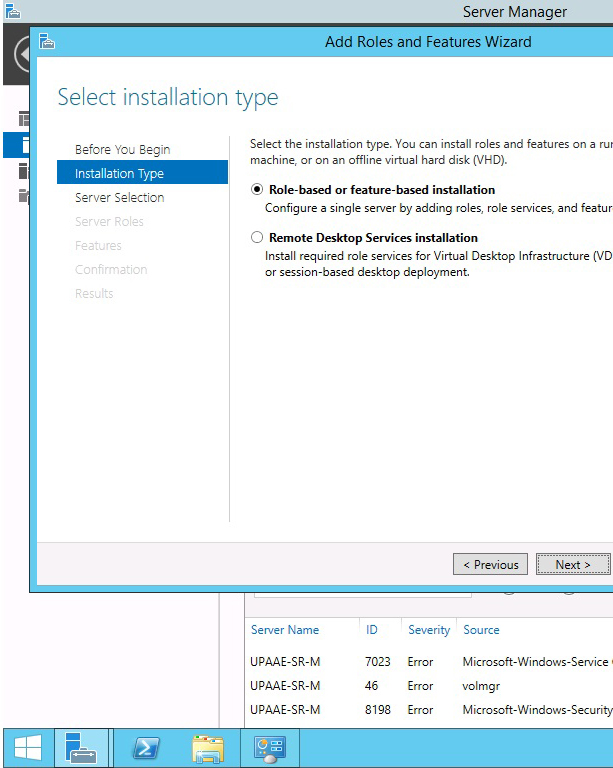
On the next screen keep the Role-based or feature based installation option selected as we are installing Domain Controller role on the local server and click next.
Step 5:
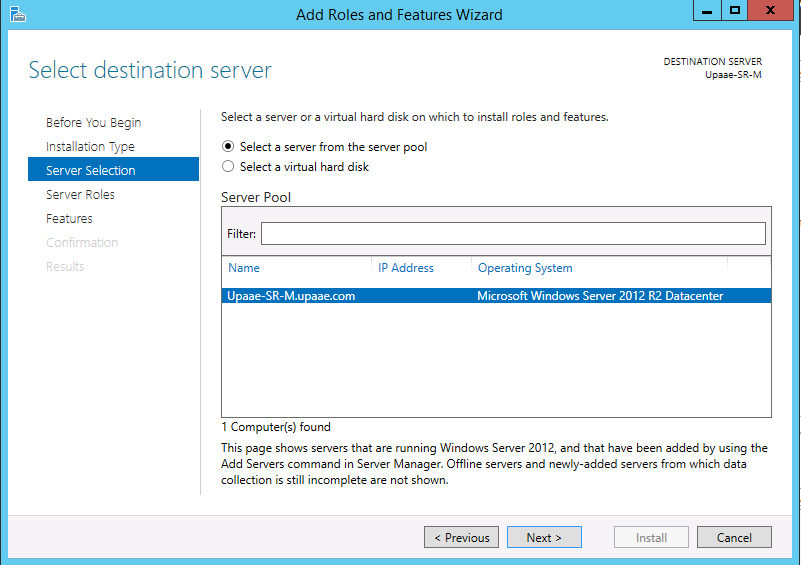
Select your server on which you want to install Active Directory Domain Services (ADDS) role and click Next button.
Step 6:
Select Active Directory Domain Services from the Roles list and click next.
Step 7:
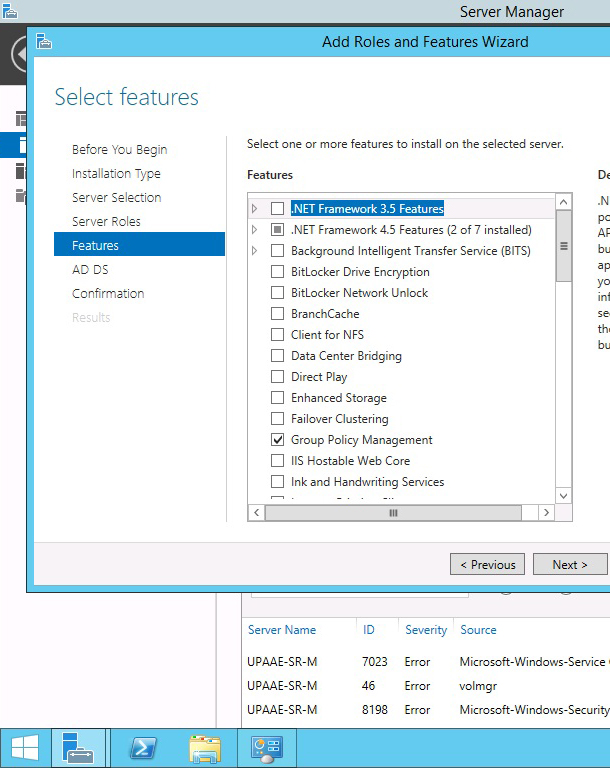
From the Features list leave the default features selected and click next.
Step 8:
On AD DS tab read the notes and click next.
Step 9:
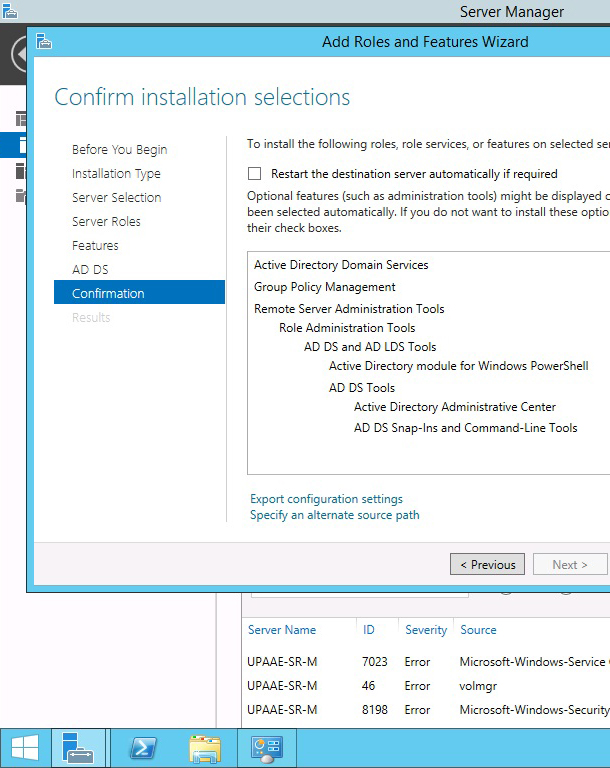
On the conformation tab click install, it will take a moment so wait for AD DS to install.
Step 10:
When AD DS installs you will see a notification / alert for promoting this server to a Domain Controller. In our case we do not have any other server acting as a domain controller, click on this alert as shown in the following screen shot.
Step 11:
Upon the completion of step 10, click on the Promote this server to a domain controller hyperlink from the notifications list.
Step 12:
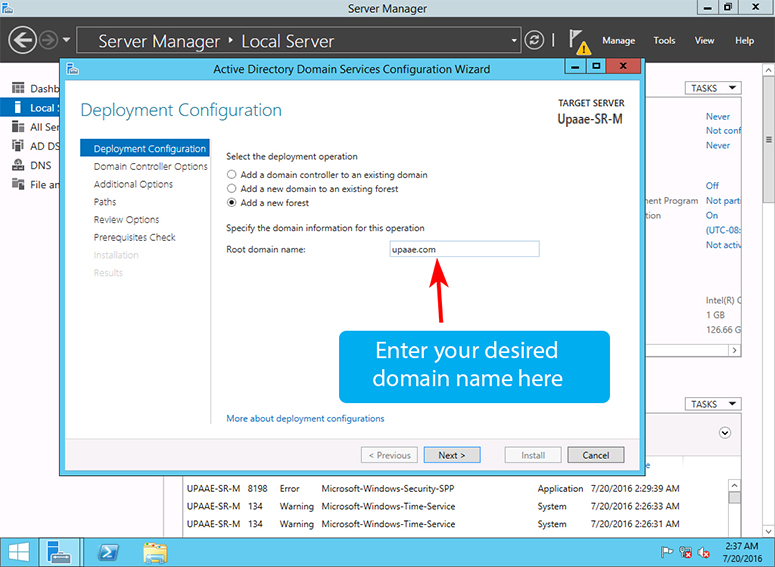
A new window of Active Directory Domain Services Configuration Wizard will open. Select the option of Add a new forest and enter your desired name for your domain and click next.
Step 13:
On the Domain Controller options Tab select Windows Server 2012 R2 for the options, Forest functional level and Domain functional level, as we only have windows server 2012. You will choose different values for these options if you have a mixed network of servers consisting of windows server 2008 and windows server 2003 along with windows server 2012. Type your Directory Services Restore mode password and click next button.
Step 14:
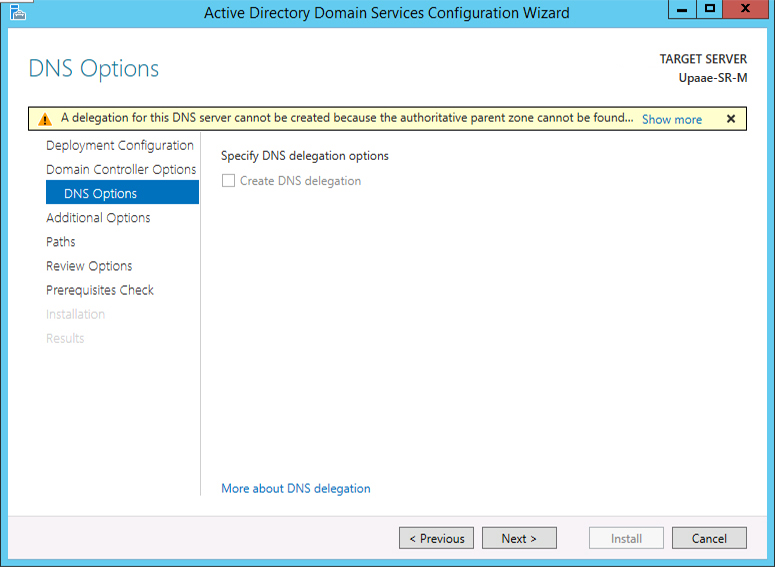
On the DNS Options Tab we do not want to specify any DNS delegations so click next button.
Step 15:
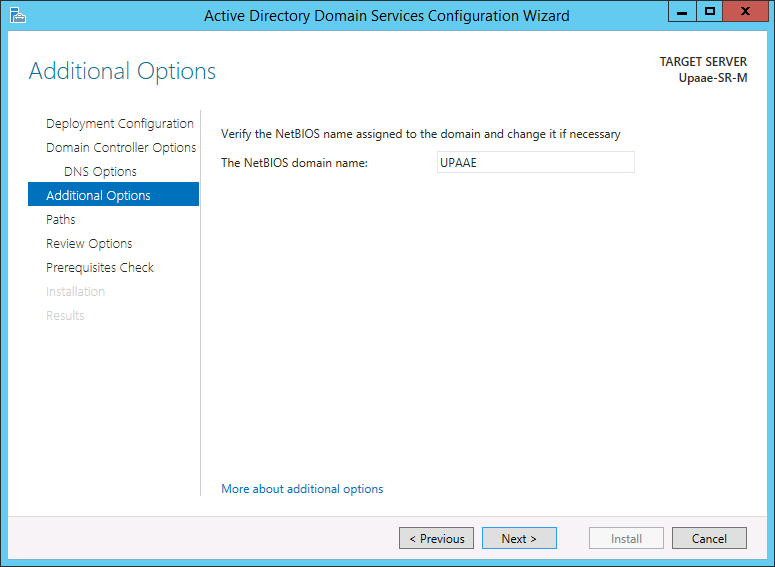
Wait for the assignment of NetBIOS name for the domain, if you are happy with the auto generated NetBIOS name leave it otherwise you can change it, click next button.
Step 16:
In the Paths Tab you specify the paths for Databases Folder, Log Files Folder and SYSVOL folder but we will leave the default path values. Click next button to continue.
Step 17:
Review your settings and selection for the Domain controller and click next button.
Step 18:
Wait for the Server to run pre-requisite check, and if there are no errors click Install button and wait for it to install.
Upon the completion of all the steps you will have a successful installation of AD DS on your server.
