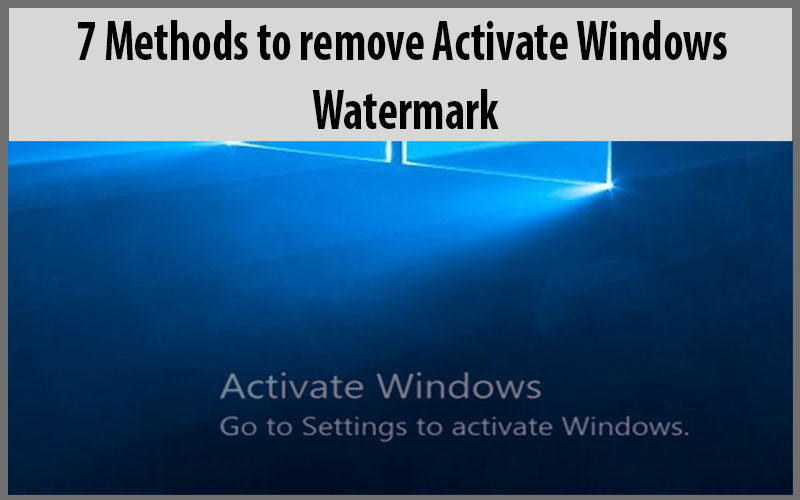
Activate Windows watermark ruins the overall experience of using your system, it appears on top of every window you open, every app and even appears on top of games you play. when you share your screen with a friend, co-worker or with a client Activate Windows Watermark will be there telling them loud that you are using and unregistered version of windows. Don’t worry we are going to share with you 5 working methods to get rid of Activate Windows watermark.
Why Activate Windows watermark Appears?
Activate Windows watermark appears when you have lost your license key, or don’t have a license key for registering your version of Windows. When you have a valid license key and still the Activate Windows watermark is there then your license key is already used by someone else for registering their Windows.
Activate windows watermark also appears when you install windows 10 professional and have entered the license key of Windows 10 Home edition. In this case you have entered a valid key but your windows versions are different that’s why windows place Activate Windows watermark.
1. Get a genuine copy of Windows with a valid Product or License key(Recommended)
It is the most simple and legal way to get a valid copy of Windows 10 or Windows 11 from Microsoft, install and register it. This is the only option you will be able to customize or personalize your windows if it is properly registered. Other methods are little tweaks which can only help you to remove Activate Windows watermark but you will be unable to personalize your windows.
Steps for activating Windows:
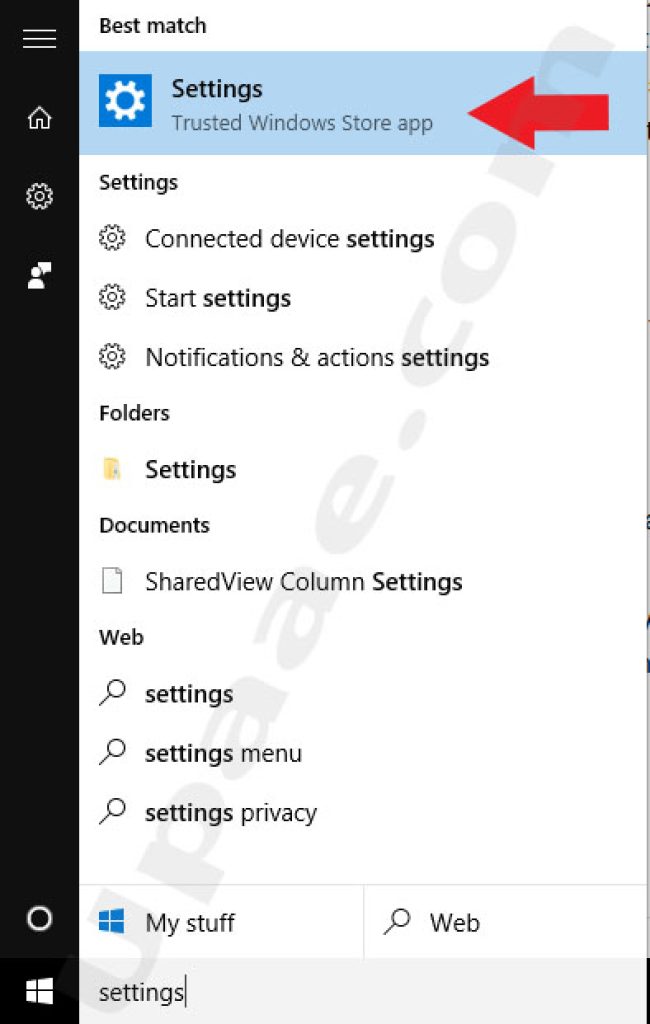
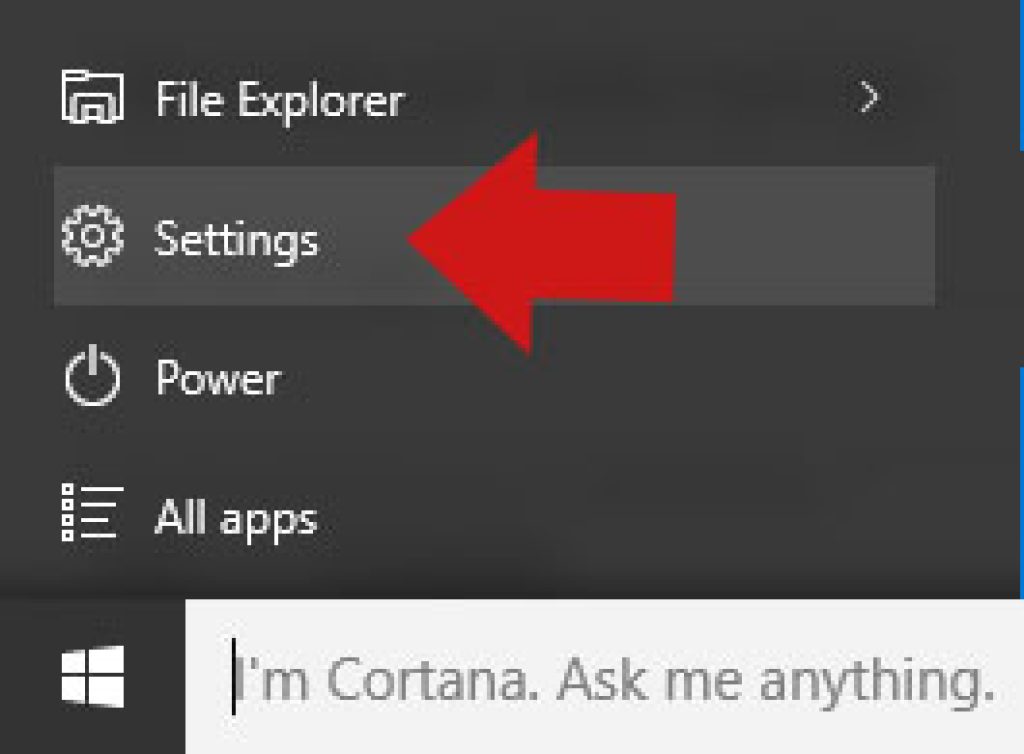
If you have a valid License key go to start menu, type settings and click on Settings.
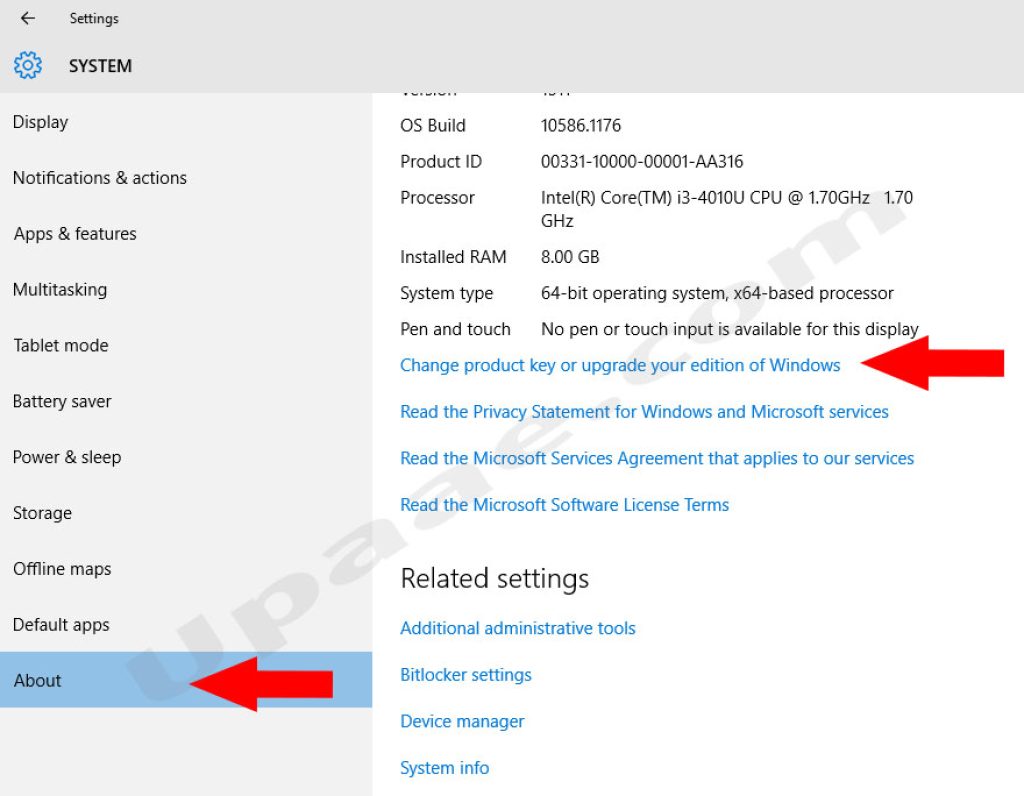
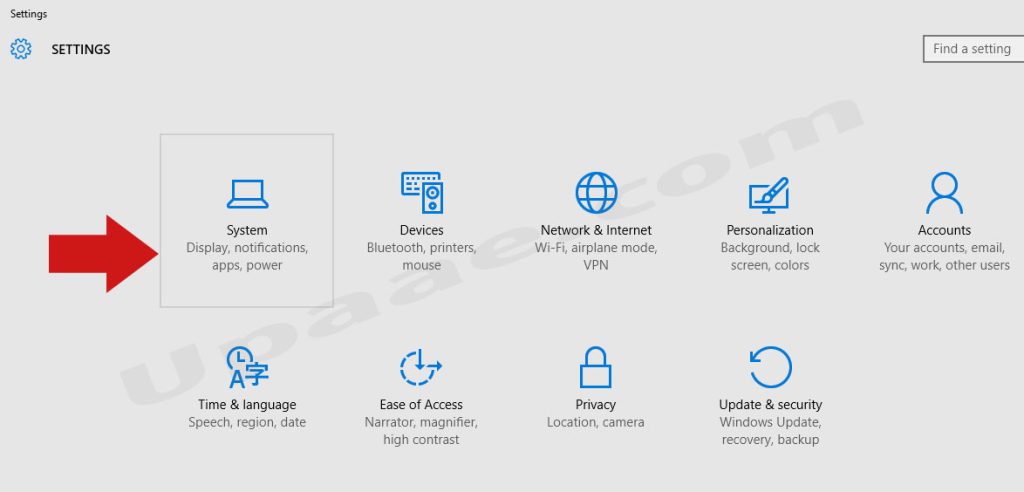
Click on System, select About from the left menu, scroll down and click on Change product key or upgrade your edition of windows.
On the next window Click on Change product key Button and enter your windows product/license key.
Enjoy using an activated and registered windows.
2. Get Rid of Activate Windows Watermark through Control Panel
Press windows button on your keyboard OR click on windows icon located at bottom left of the taskbar. Type Control Panel and click on the Control panel app to launch it.
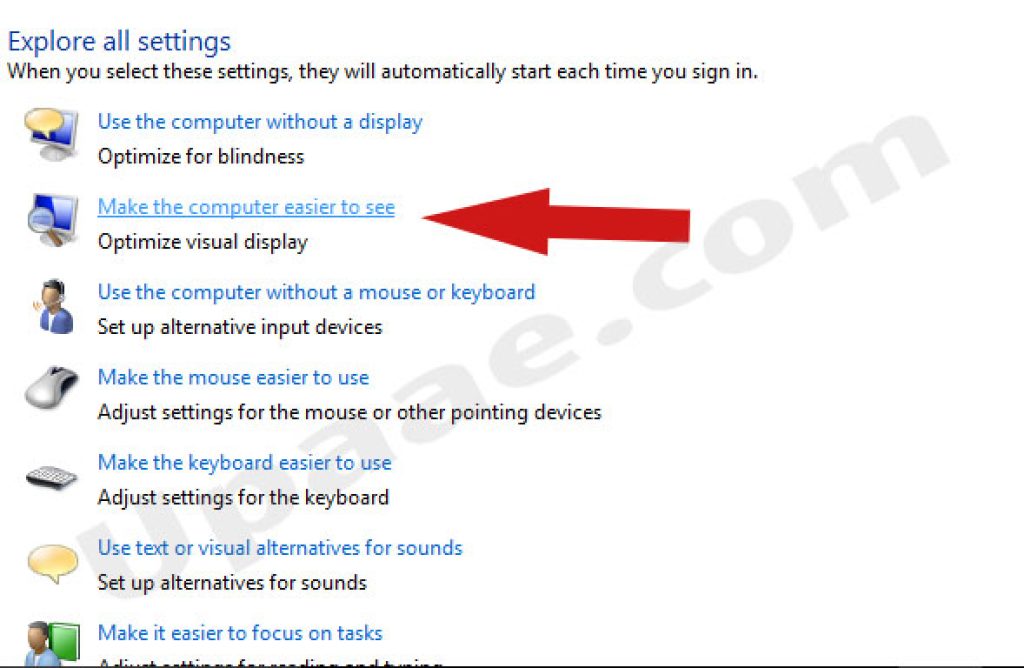
Click on Ease of Access Center to open it.
Click on Make the Computer easier to see.
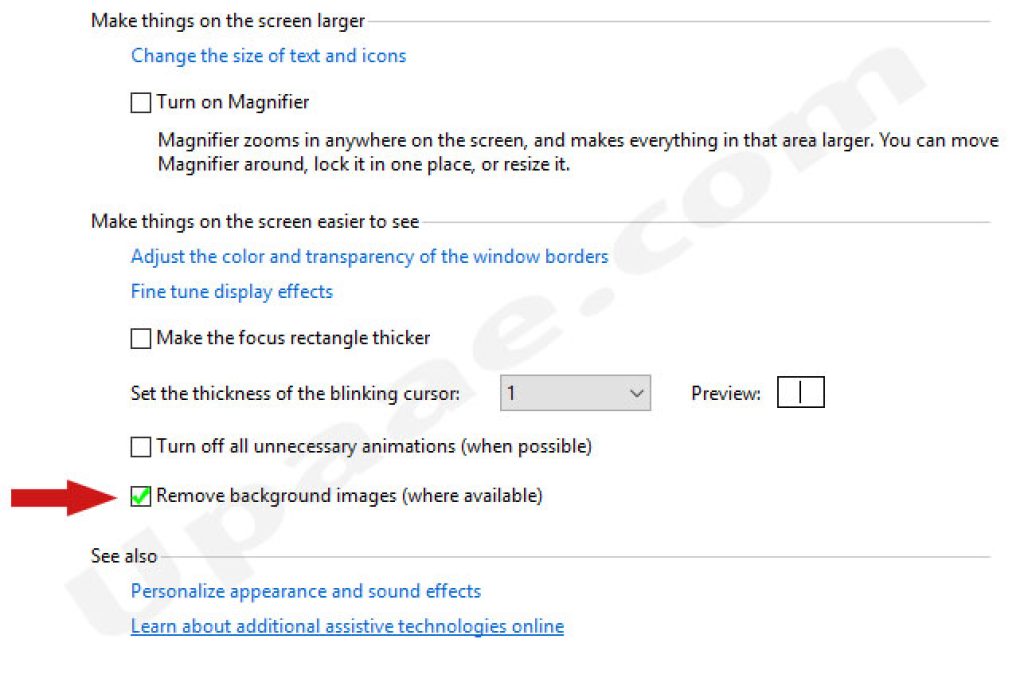
Scroll down and tik (check) the box next to Remove background images (where available).
Now Click OK Button, restart your system and the Activate Windows Watermark should be gone.
You should note that this methods will temporarily remove Activate Windows Watermark, just follow the same steps to remove this watermark if it appears again.
3. Get rid of Activate Windows Watermark by using Windows PowerShell
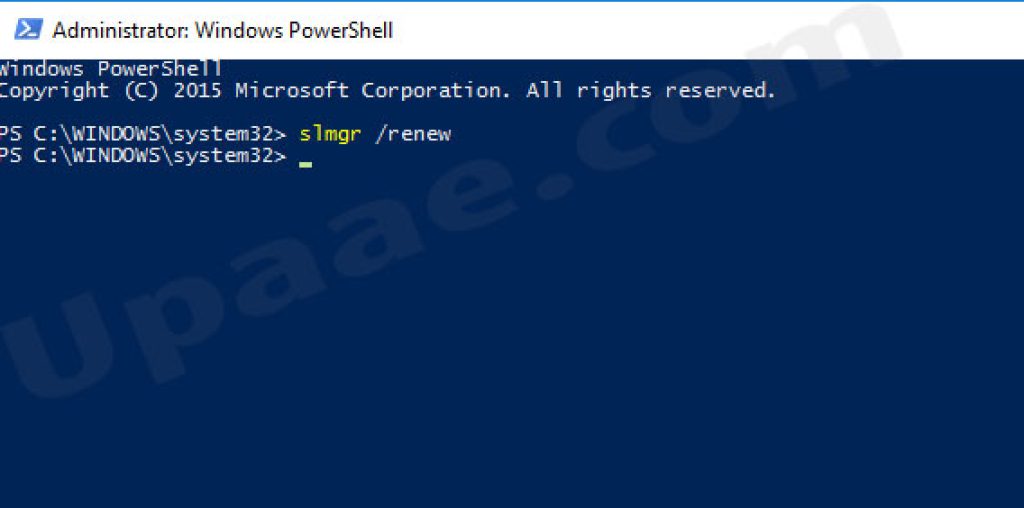
Press windows button on keyboard or go to start menu, type powershell, right click on Windows PowerShell and select Run as Administrator.
Type slmgr /renew and press enter.
Restart your system and check if watermark is gone. If Activate Windows watermark is still there then you should follow and apply any other method on this page, we are confident that one of these methods discussed here will work for you.
4. How to get rid of Activate Windows Watermark by Editing Windows Registry
Windows registry is a hierarchical database which is continuously referenced by Windows during operation. registry keep the low level information for applications and as well as windows itself.
Although the method we are going to share with you is quite safe, but We recommend you to backup your windows registry before making any changes. If you are ready follow the below steps.
Click on the start menu (windows icon) located at bottom left of the taskbar, type run and click on run when appear. Alternatively right click on start menu, scroll down and select Run from the menu. Type regedit in Run text input and click OK to open windows registry.
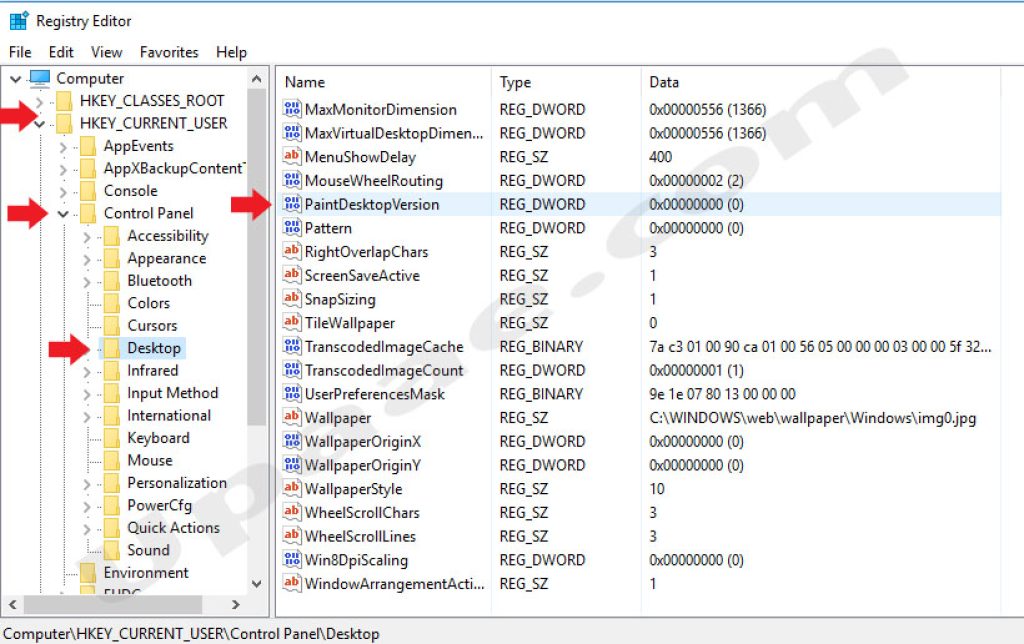
In the Registry windows click on the arrow next to HKEY_CURRENT_USER to expand, now look for control panel and click the arrow to expand, click on desktop, scroll down and locate PaintDesktopVersion.
Double click on PaintDesktopVersion, change the value 0 to 1 and press OK button.
Congrats you have edited the registry successfully, restart your system and you will have a watermark free desktop.
5. Remove Activate Windows Watermark through Windows 10 Tips
Press windows key on the keyboard or click on windows icon (start menu) on the taskbar and click on settings icon.
Click on System.
Select Notifications & Actions and turn off the buttons next to Get tips, tricks and suggestions as you use windows and Show me the Windows welcome experience after updates and occasionally when i sign in to highlight what’s new and suggested.
6. How to Remove Activate Windows Watermark using CMD
This method will work when test mode is already enabled in windows, sometimes enabling test mode causes Activate windows watermark to appear. By disabling test mode you might get rid of Activate Windows Watermark.
Open command prompt by pressing windows button on keyboard or by clicking windows icon on the taskbar located to bottom left. Type command prompt and right click on the command prompt icon and select run as administrator.
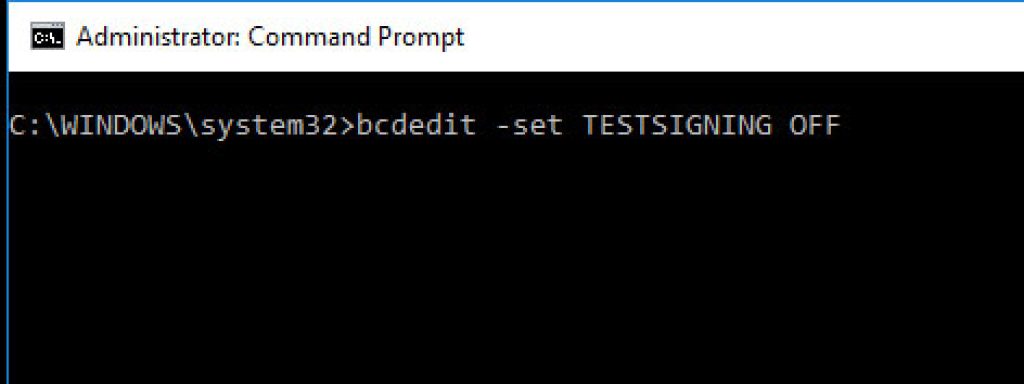
Type this command: bcdedit -set TESTSIGNING OFF and press enter.
If test mode was enabled then you will get a success message “The Operation Completed Successfully”. Restart your PC and the watermark will be gone. If you don’t get a success message don’t worry try another method listed on this page.
7. Use a Third Party app to Remove Activate Windows Watermark:
If none of the above methods worked for you then you should try using a third party tool for disabling the Activate windows watermark. These tools are available there but we are not going to recommend any of those as they may perform suspicious activity in the background.
