System restore points provide us with a safe backup point if anything unexpected happens while installing new programs, updates or being compromised by plugging malicious USB or any external storage device. System protection being turned on let us revert to a working system state, ensuring that whatever happens you will get a working windows.
You may have to install your required applications if a system restore point is created before the installation of those applications.
We all know that systems running Windows operating system gets slow while being used for sometime, and nobody wants a system with slow running operating system. If this is your case you can get back to the previous fast running windows state by just restoring that restore point.
It is extremely helpful to enable and configure system protection and create a manual restore point while your systems performance is at peak. We will help you to create your first restore point by following the steps below.
1. Press windows button on your keyboard OR click on the windows icon in the bottom left of taskbar, Type Control Panel and click on Control Panel.

2. In Control Panel window click on Save backup copies of your files with File History located under System and Security.

3. From the File History page click on Recovery at the bottom left.

4. Click on Configure System Restore from the Recovery window.

5. We have already on system protection for Drive:C (system), that’s why for demonstration we will turn on system protection for Drive: D. It is best to turn on system protection for the drive on which your windows is installed. Select the Drive for which you want to turn on system protection and click on Configure Button.

6. Under restore settings select the radio button next to Turn on system protection and allocate some space by moving the slider to right for storing restore points under the Disk Space Usage title. Click Apply button or OK button, this will get you back to the System Properties window same as the screenshot in above step.

7. Click on Create button and enter a name for your first system restore point in System properties window and wait for the restore point to complete.

8.You will get a success message if a restore point is successfully created, click on Close button to view the restore point.

9. If you want to view or perform a system restore, Click on System Restore button.

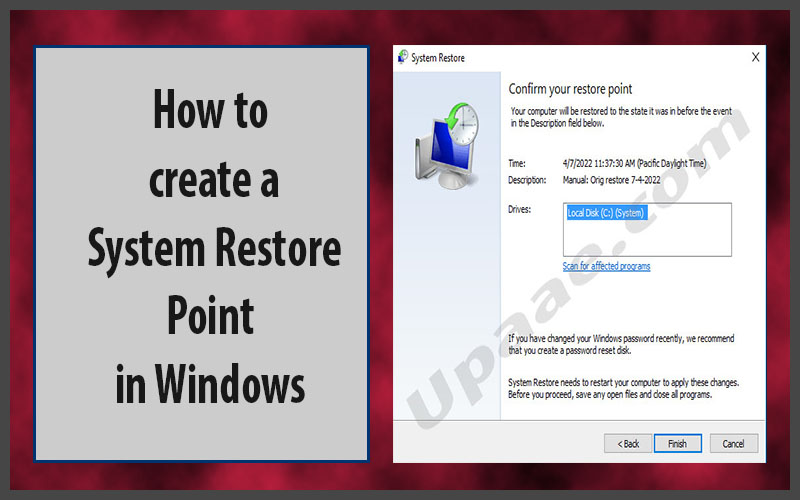
10. If you want to revert back to a previous state, Click Next button, select your restore point to apply and again click Next button and then finish button to successfully apply a restore point.


Clicking on the Finish button will apply the selected restore point, you may have to re-install your application if the selected restore point is old then the recently installed applications.