Rooting Samsung Galaxy J500F running Marshmallow 6.0.1 :
In this tutorial i am going to share the exact steps i followed rooting my Samsung Galaxy J500F device with the solutions to all the errors/problems that you may face in the process. Although you can follow these exact steps for rooting any android device but i will not recommend that because i have tested these only on Samsung Galaxy J5 running android version 6.0.1(marshmallow).
I will not go into the details of discussing merits and demerits of a rooted device, if you want to know more about the advantages and disadvantages of rooted device internet is full of that info all you have to do is search.
Tools needed for rooting process:
1, Download and install Samsung Usb Drivers. Click here to download
2, Odin3. click here to download odin3.
3, TWRP latest version. Click here to download TWRP for J500f.
4, Super Su version 2.76. Click here to download SuperSu version 2.76 for J5.
Step 1
Download and install Samsung USB drivers, if you already have Samsung KIES installed than leave this step.
Step 2
Enable USB debugging on your device, if you are using Android Marshmallow version 6.0.1 than follow this turorial, Activating Developer Options and USB debugging on Marshmallow.
Step 3
Connect your android device to your PC through USB cable and copy superSU version 2.76 zip file to your device external SD Card and unplug USB cable from your android device .
Step 4
Right click on Odin3.exe and select Run as Administrator.
Step 5
Now power of your Android device and put it in the download mode by pressing Power Button+ Volume Down Button+ Home Button simultaneously.
Step 6
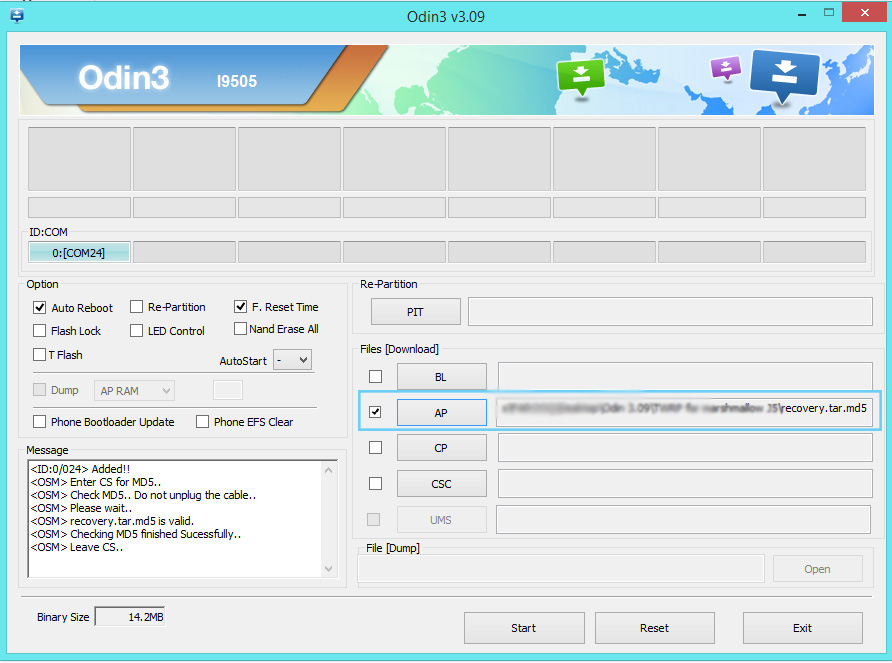
Press volume up key and connect your Android device to PC through USB cable. On connecting to your PC your Odin will look like this screenshot. If your Odin screen look the same like the below screenshot it means your device is ready to root.
Step 7
Click on the AP button and select the TWRP you have downloaded.
Step 8
Now press start button and wait for Odin, if Odin displays a Pass message it means custom recovery is successfully flashed.
Step 9
Now Power OF your android device and boot in to recovery mode by pressing Power Button + Volume Down Button + Home Button simultaneously. If you have followed all the steps correctly than your device will boot in to TWRP recovery mode exactly like the below screenshot.
Step 10
Click Install on from the TWRP main page.
Step 11
Select SuperSU.zip file and click install.
Step 12
Swipe to begin installation.
Step 13
After Successful Installation reboot your device. And you will have a rooted device.
Download any root checker app on your android device and confirm. Feel free to ask in comments for any problems you face in rooting Samsung galaxy J5 and also share with us if you know a better solution.


