Install document and print services on windows server relatively easy with in a few steps illustrated with screenshots. Printers are getting an essential part of almost every size of office, but larger offices/companies need a centralized control of their printers in which print server needs to be installed and configured. The existence of Print Servers made the management, control and accessibility of all the printers from a single point relatively easy. System Administrators and MCSE students are required to practice and learn the configuration and installation of print servers. In Windows Server 2012 you need to install the role of Print and Document Services for making a print server, this quick tutorial will walk you through all the necessary steps for installing Print and Document Services role on windows server 2012.
Step 1:
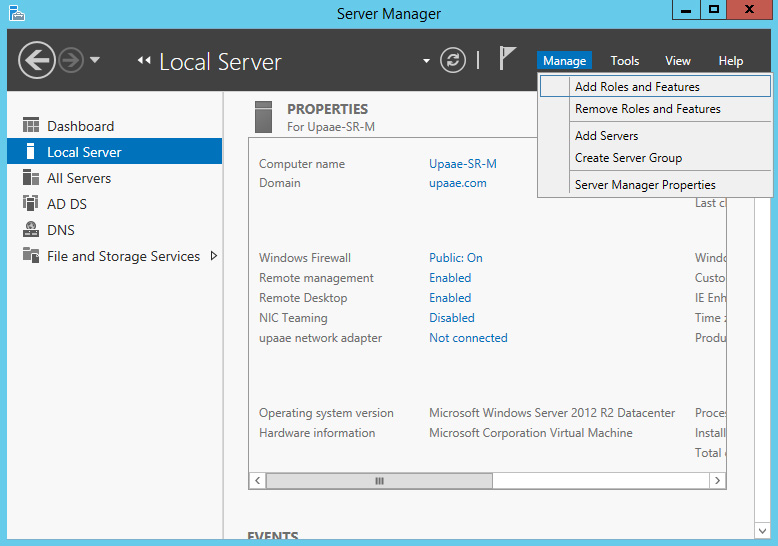
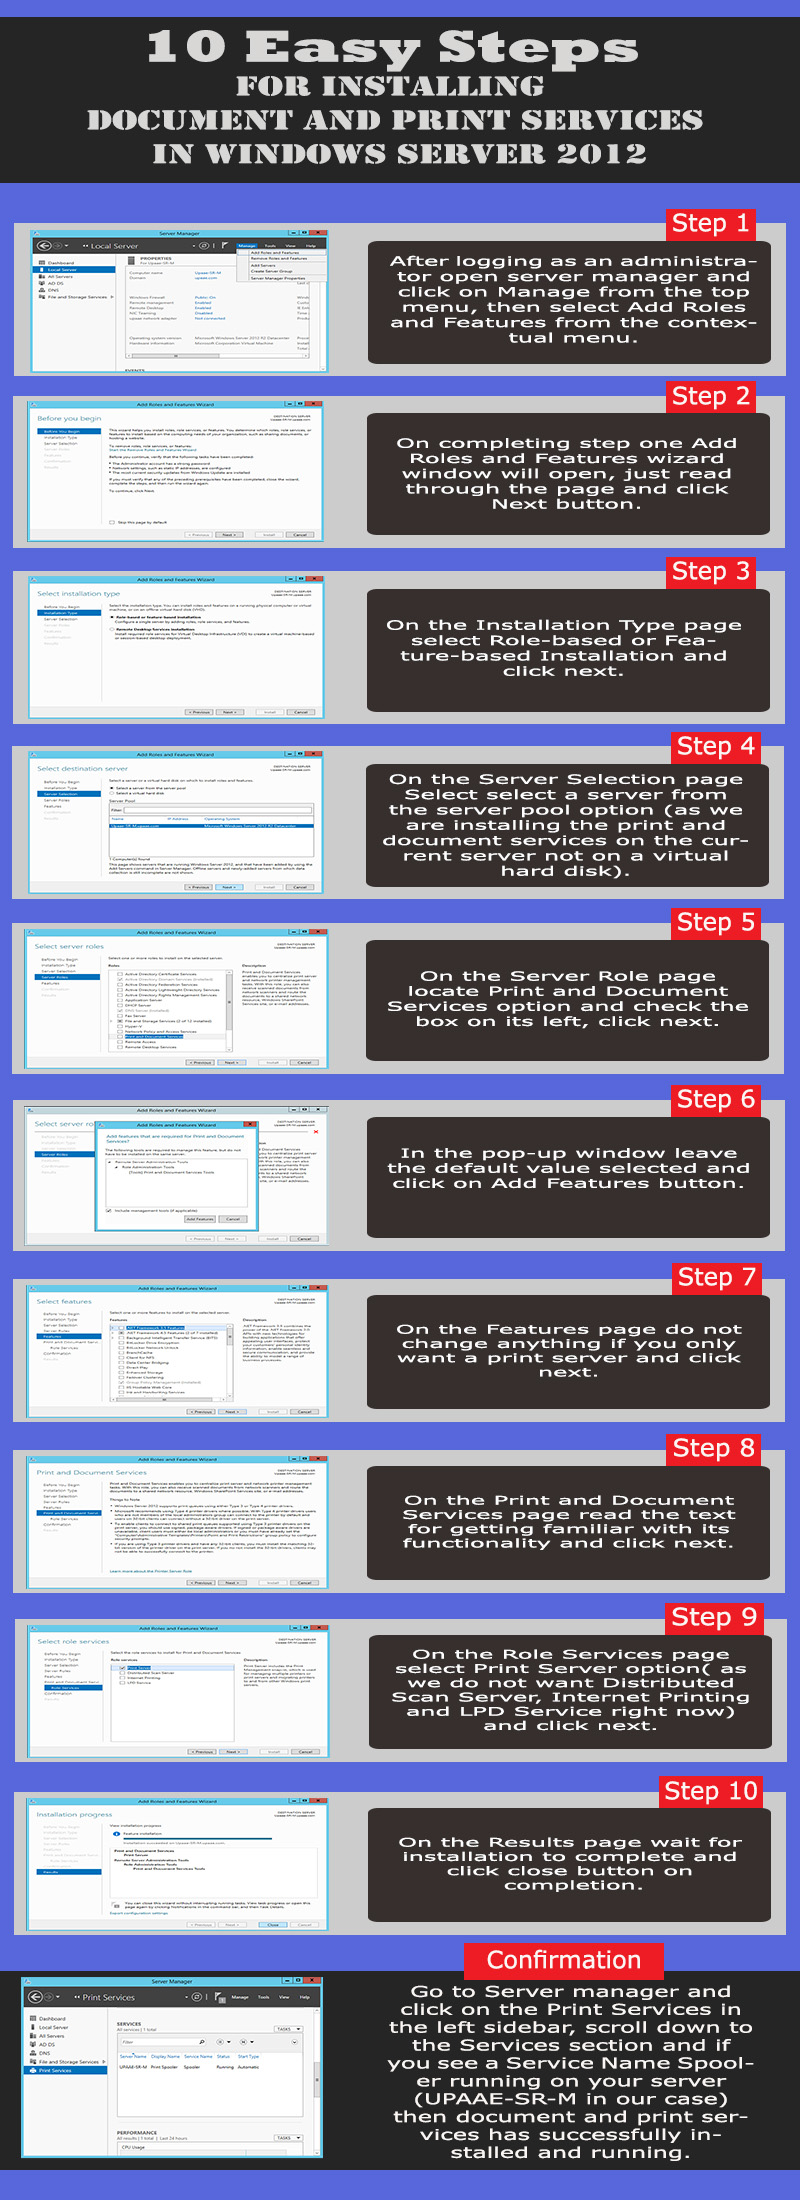
After logging as an administrator open server manager and click on Manage from the top menu, then select Add Roles and Features from the contextual menu.
Step 2:
On completing step one Add Roles and Features wizard window will open, just read through the page and click Next button.
Step 3:
On the Installation Type page select Role-based or Feature-based Installation and click next.
Step 4:
On the Server Selection page Select select a server from the server pool option (as we are installing the print and document services on the current server not on a virtual hard disk).
Step 5:
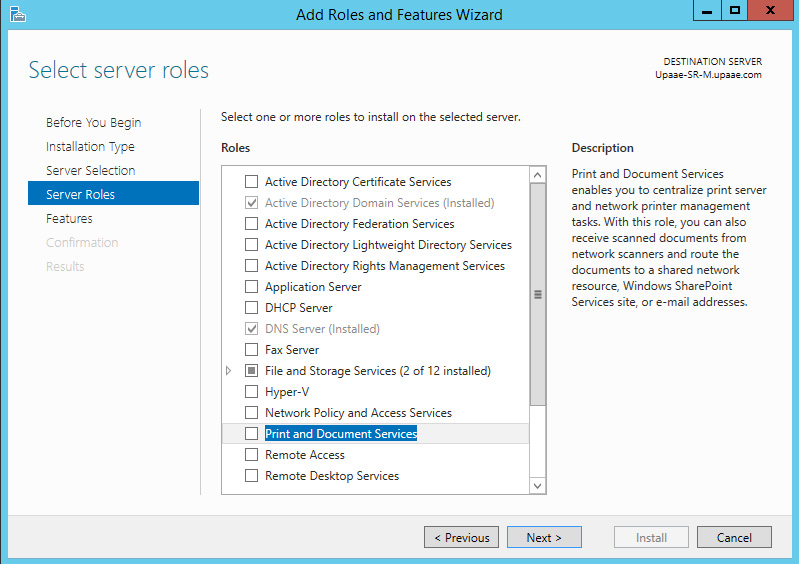
On the Server Role page locate Print and Document Services option and check the box on its left, click next.
Step 6:
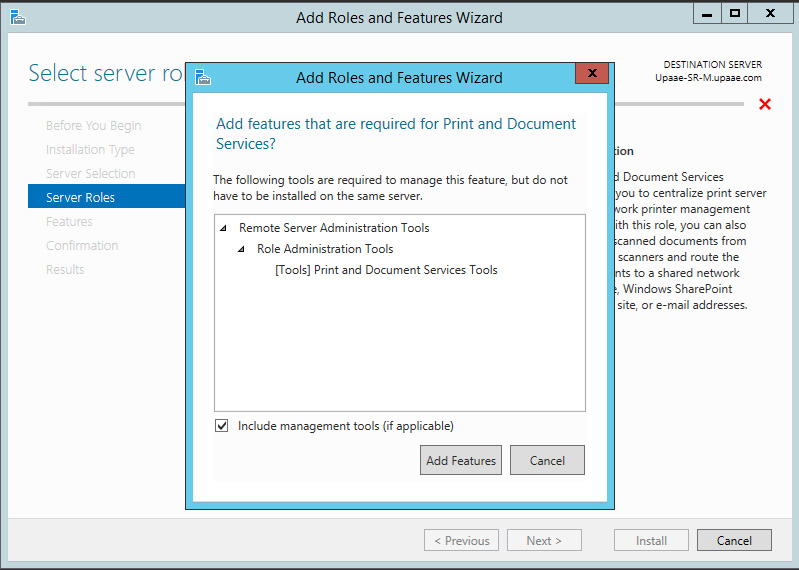
In the pop-up window leave the default value selected and click on Add Features button.
Step 7:
On the Features page do not change anything if you only want a print server and click next.
Step 8:
On the Print and Document Services page read the text for getting familiar with its functionality and click next.
Step 9:
On the Role Services page select Print Server option( as we do not want Distributed Scan Server, Internet Printing and LPD Service right now) and click next.
Step 10:
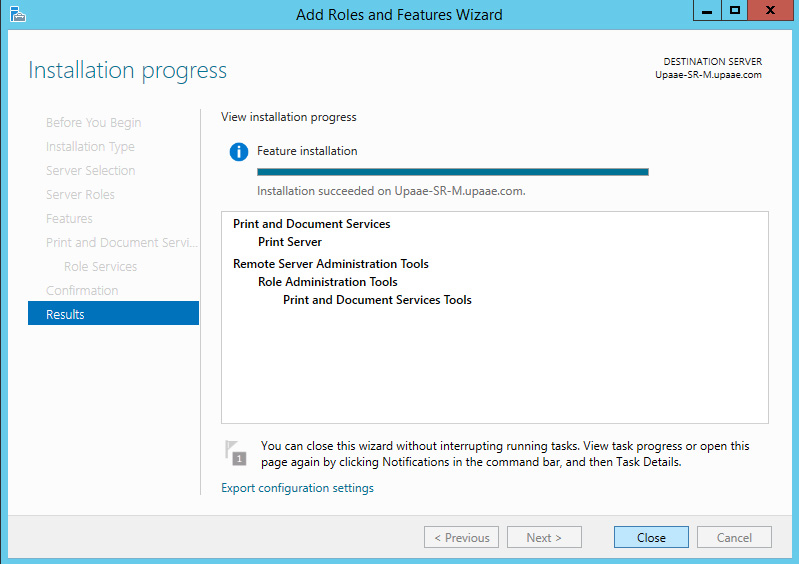
On the Results page wait for installation to complete and click close button on completion.
Confirmation:
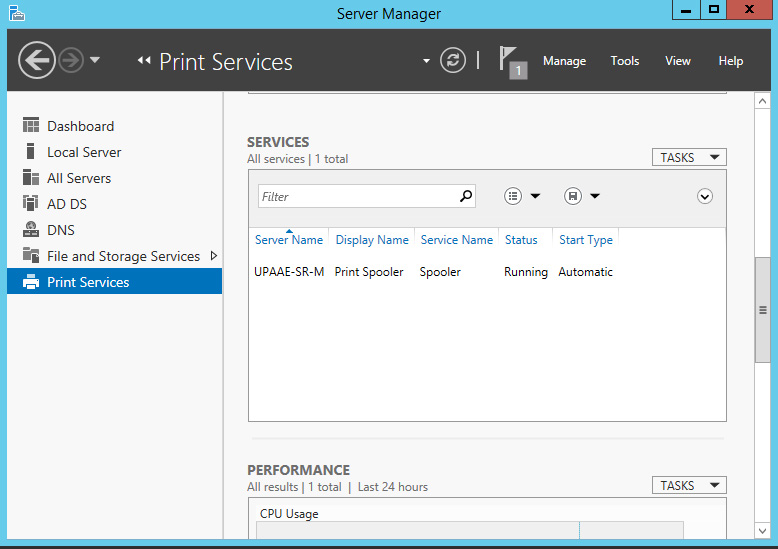
Go to Server manager and click on the Print Services in the left sidebar, scroll down to the Services section and if you see a Service Name Spooler running on your server (UPAAE-SR-M in our case) then document and print services has successfully installed and running.
