How to Share a Folder in Windows Server 2012 (Using Server Manager):
File Sharing is a feature included in the Windows operating systems since beginning but some changes are made to the process of folder sharing in windows server 2012.
Prior to step by step guide for sharing a folder you need to install File and Storage Services role which comes with windows server 2012.
Note: This is a quick tutorial describing the steps for sharing a folder without going deep in the details.
Step 1:
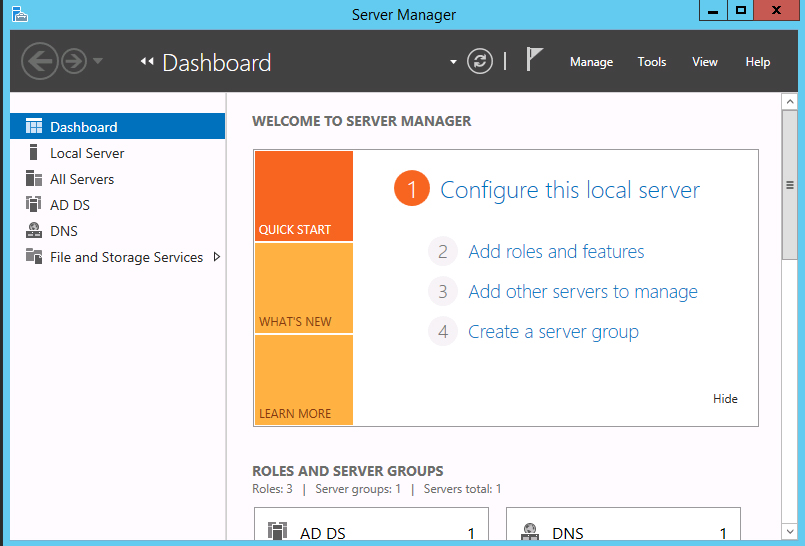
Open Server Manager, if File and storage Services role is installed on your server you will see it in the left sidebar.
Figure 1
Step 2:
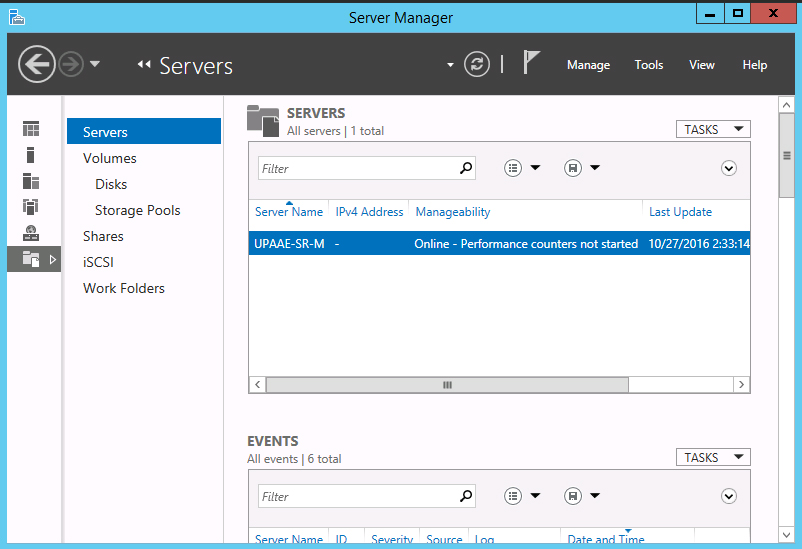
Click File and Storage Services menu item in the right sidebar a new column adjacent to the right sidebar will be opened.
Figure 2
Step 3:
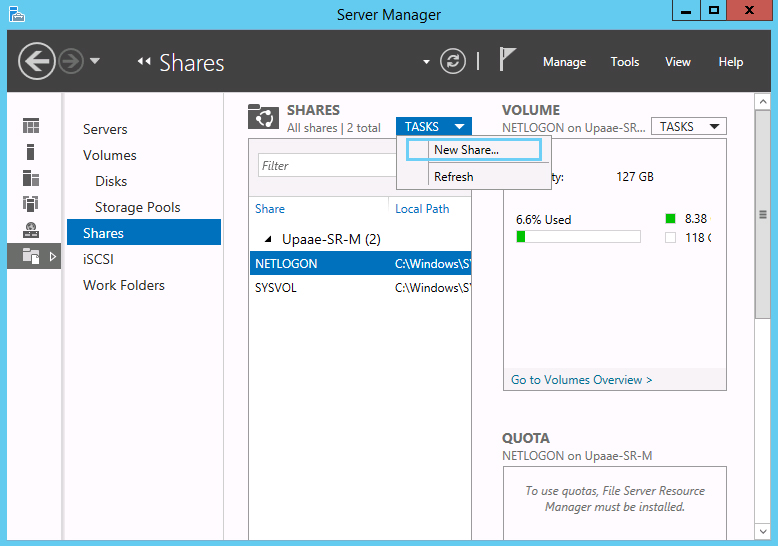
Click on the Shares Text from the new column, the folders already being shared will be displayed, in this case you will see SYSVOL and NETLOGON folders because this server has ADDS installed and acting as a domain controller. In your case you might not see these folders.
Figure 3
Step 4:
Click on the TASKS just as shown in Figure 4 and select new share, a new window will open named New Share Wizard.
Figure 4
Step 5:
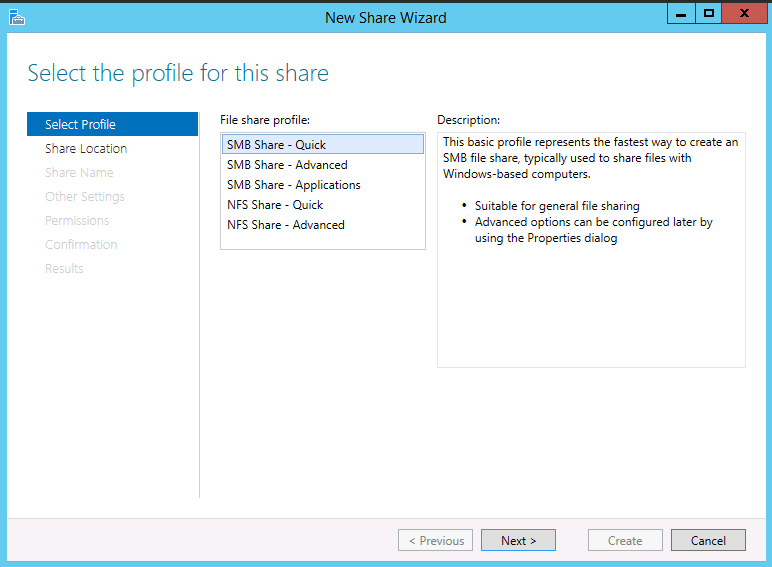
In the New Share Wizard Window select SMB Share – Quick and click next.
Figure 5
SMB Share – Quick:
This basic profile represents the fastest way to create an SMB file share, typically used to share files with Windows-based computers.
- Suitable for general file sharing
- Advanced options can be configured later by using the Properties dialog
SMB Share – Advanced:
This advanced profile offers additional options to configure a SMB file share.
- Set the folder owners for access-denied assistance
- Configure default classification of data in the folder for management and access policies
- Enable quotas
SMB Share – Applications:
This profile creates an SMB file share with settings appropriate for Hyper-V, certain databases, and other server applications.
NFS Share – Quick:
This basic profile represents the fastest way to create a NFS file share, typically used to share files with UNIX-based computers.
- Suitable for general file sharing
- Advanced options can be configured later by using the Properties dialog
NFS Share – Advanced:
This advanced profile offers additional options to configure a NFS file share.
- Set the folder owners for access-denied assistance
- Configure default classification of data in the folder for management and access policies
- Enable quotas
Step 6:
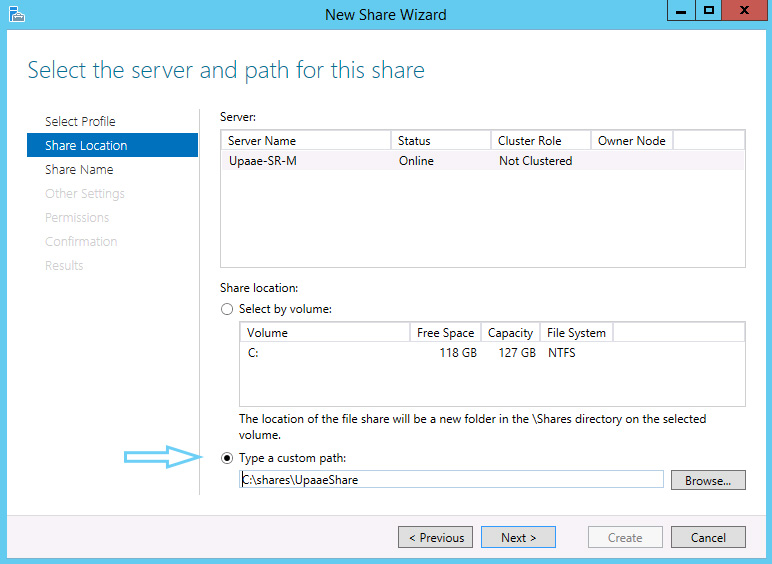
On the Share location page I have selected custom path but you can go on with the default and click next.
Figure 6
Step 7:
On the Share Name Tab specify a name for your share folder and description as you like and click next.
Figure 7
Step 8:
On the Other Settings page select Enable access-based enumeration if you want to restrict certain type of users accessing this shared folder. If you don’t want to restrict user access leave Enable access-based enumeration un-checked and click next.
Figure 8
Step 9:
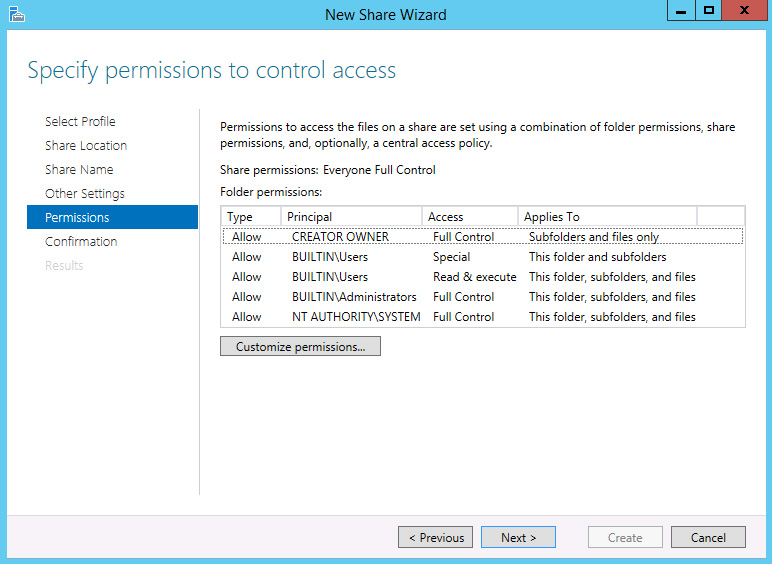
On the Permissions page leave all the default values if you do not want to restrict user groups. I am going with the default permissions. Click next.
Figure 9
Step 10:
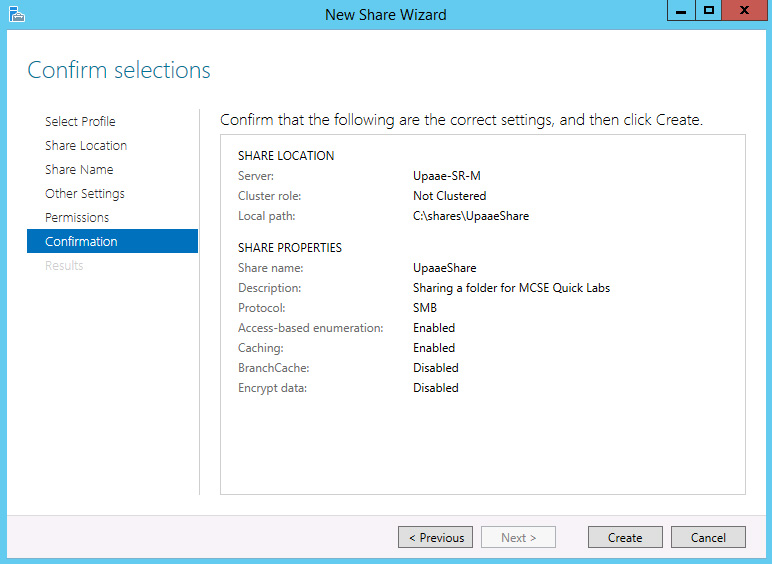
On Confirmation page take a look at different values you have set and click Create button.
Figure 10
Step 11:
If you have followed the above steps the Results page will open with success message, now click close button.
Figure 11
After closing the New Share Wizard you will see the newly created share in the Shares window.
Confirming if the newly shared folder is working:
In the Shares window right click on the newly created share and select open share option. If this share is working you will be taken to the share folder containing your files.
That’s all you need to do for creating a share in windows server 2012 using server manager, hope that you have enjoyed this simple and easy step by step tutorial.
If you know a better way of creating a shared folder in windows server, do share with us. Feel free to ask in comments if you have any difficulty creating a share in windows server.

